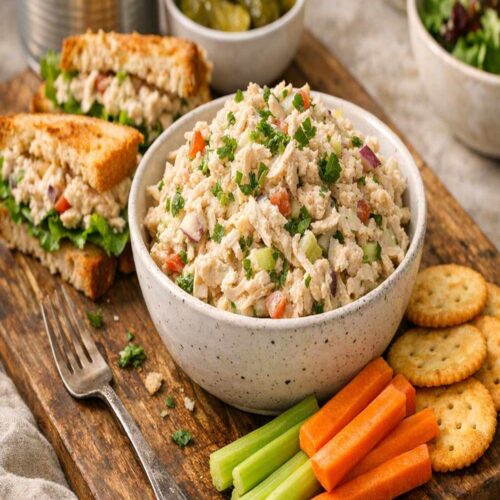
Canned Chicken Salad Recipe
Sometimes the best meals are the ones that come together in minutes—especially when you're juggling work, family, and everything in between. This canned chicken salad is my go-to when I need something satisfying, protein-packed, and genuinely delicious without hours in the kitchen. Pair it with fresh vegetables, whole grain wraps, or even enjoy it alongside corn salsa for a lighter lunch with real character.
Ingredients
- ½ teaspoon kosher salt adjust to taste
- 1 tablespoon fresh lemon juice brings brightness and natural acidity
- ⅓ cup mayonnaise full-fat, made with real eggs
- ¾ teaspoon ground black pepper freshly cracked preferred
- 12.5 ounce canned chicken breast water-packed, drained thoroughly
- ¼ cup grated Parmesan cheese freshly grated if possible
Instructions
Step 1: Drain and Flake the Chicken
- Open your can of chicken and pour the contents into a fine-mesh strainer set over the sink. Let it drain completely—about 30 seconds—pressing gently with a fork to remove excess liquid. This step matters more than it sounds. Excess moisture will dilute your salad and make it watery by lunchtime. Transfer the drained chicken to a medium mixing bowl. Using a fork, gently flake the chicken into bite-sized pieces. Don't pulverize it into a paste—you want texture that feels substantial when you eat it. The chicken should break apart easily; if it feels rubbery or tough, you likely have a lower-quality brand. Make note for next time.

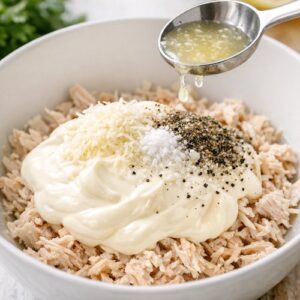
Step 2: Add the Creamy Base and Seasonings
- Pour the mayonnaise directly over the flaked chicken. Add the grated Parmesan, ground pepper, kosher salt, and fresh lemon juice. I recommend starting with slightly less salt than listed—you can always add more, but you can't take it out. The lemon juice deserves special mention here. As a dietitian, I'm always thinking about flavor-to-nutrition ratios. Lemon juice adds brightness and natural acidity that makes everything taste fresher and more alive. It also helps preserve the salad if you're making it ahead, and it reduces the need for extra salt. It's a small addition with outsized impact.
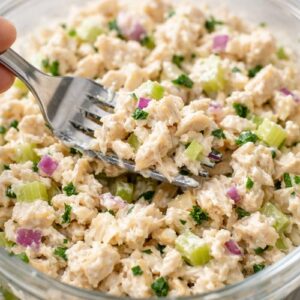
Step 3: Combine Thoroughly
- Using your fork, stir everything together gently but thoroughly. You want to distribute the mayonnaise evenly so every bite is creamy, but avoid over-stirring, which will break the chicken apart too much. Taste a small spoonful and adjust seasonings. The mixture should taste savory and well-seasoned, but not salty. If you're serving this immediately, you can eat it right now—total time elapsed, about 5 minutes.
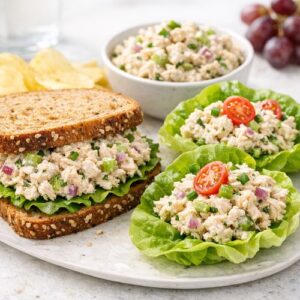
Step 4: Serve Your Way
- This is where your creativity comes in. Spread the salad onto whole grain bread for a classic sandwich. Pile it into lettuce cups for a low-carb option. Mix it with pico de gallo and serve in whole wheat tortillas. Serve it over mixed greens as a composed salad. The vehicle matters far less than the quality of what's inside.
Notes
- Make It Ahead (But Not Too Far) - Prepare this up to 2 days in advance and store it in an airtight container. The flavors actually meld nicely overnight. Any longer and the texture starts to degrade as the mayo continues breaking down the chicken fibers.
- Add Fresh Elements at Serving Time - Keep your salad plain, but add fresh herbs, diced vegetables, or nuts right before eating. This keeps textures crisp and prevents the salad from becoming soggy.
- Layer for Better Flavor Distribution - When making sandwiches, spread some mayonnaise on the bread first, then add lettuce, tomato, and your chicken salad. This creates barriers that prevent sogginess.
- Use Your Hands (Yes, Really) - After combining, I sometimes use clean hands to gently toss everything together one more time. You get better distribution and a better feel for texture than you do with utensils alone.
- Don't Skip the Drain Step - I cannot overemphasize this. Thorough draining is the difference between salad that stays fresh for two days and salad that becomes watery by day one.
- Experiment with Parmesan Styles - Aged Parmigiano-Reggiano has deeper, more complex flavor than standard domestic Parmesan. If you love savory depth, splurge here—it's worth it for a recipe this simple.
Nutrition
Calories: 417kcalCarbohydrates: 3gProtein: 32gFat: 30gSaturated Fat: 7gCholesterol: 76mgSodium: 866mg
Tried this recipe?Let us know how it was!