Elaine Gordon
When October rolls around, I find myself craving breakfast that tastes like autumn in a stack. These pumpkin pancakes hit that sweet spot between comfort and nutrition—they’re warm, satisfying, and they actually keep you full thanks to the fiber and protein working together. Pair them alongside almond butter overnight oats for a full week of cozy breakfasts, or serve them alongside a savory brunch spread.
The Story Behind My Favorite Fall Breakfast
I grew up watching my mom stand at our kitchen counter on chilly October mornings, mixing homemade pancake batter while the smell of cinnamon and nutmeg filled our tiny Jersey kitchen. She never used a mix—everything was from scratch. But as a busy dietitian and parent myself, I’ve learned that convenience doesn’t have to mean sacrificing nutrition or flavor.
That’s when I discovered the magic of starting with a quality baking mix and transforming it into something that tastes like my mom’s labor of love. These pumpkin pancakes use simple whole ingredients layered on top of a reliable base. The result? Pancakes that taste homemade, come together in 15 minutes, and actually nourish your body instead of sending your blood sugar on a roller coaster.
What Are Bisquick Pumpkin Pancakes?
Bisquick pumpkin pancakes are a fall-inspired twist on the classic American breakfast. They combine the convenience of a baking mix with the warmth of pumpkin puree, molasses, and traditional autumn spices. What makes this version special is the balance—you’re getting real pumpkin (not just flavoring), warm spices that boost antioxidants, and a texture that’s fluffy without being dense.
The beauty of this recipe is that it bridges two worlds: the speed and reliability of a prepared mix, and the satisfaction of a from-scratch breakfast. I’ve served these to everyone from my pickiest family members to clients at nutrition consultations, and they disappear every time.
Why You’ll Love This Pumpkin Pancakes Recipe
- Ready in under 20 minutes – From pantry to plate, these pancakes don’t require advanced planning. Perfect for rushed mornings when you still want something that feels special.
- Real pumpkin provides actual nutrition – Unlike pumpkin-flavored items loaded with artificial flavors, canned pumpkin gives you beta-carotene (vitamin A), fiber, and potassium. One serving delivers about 15% of your daily potassium needs.
- The spices are nutritional powerhouses – Cinnamon helps stabilize blood sugar, ginger supports digestion, and nutmeg contains compounds with anti-inflammatory properties. These aren’t just for flavor.
- Surprisingly filling and balanced – The combination of complex carbs from the baking mix, protein from eggs, and natural sweetness from molasses means these pancakes won’t leave you hungry by mid-morning.
- Freezer-friendly for meal prep – Make a double batch on Sunday and reheat throughout the week. This is real talk about busy family life.
The Ingredients
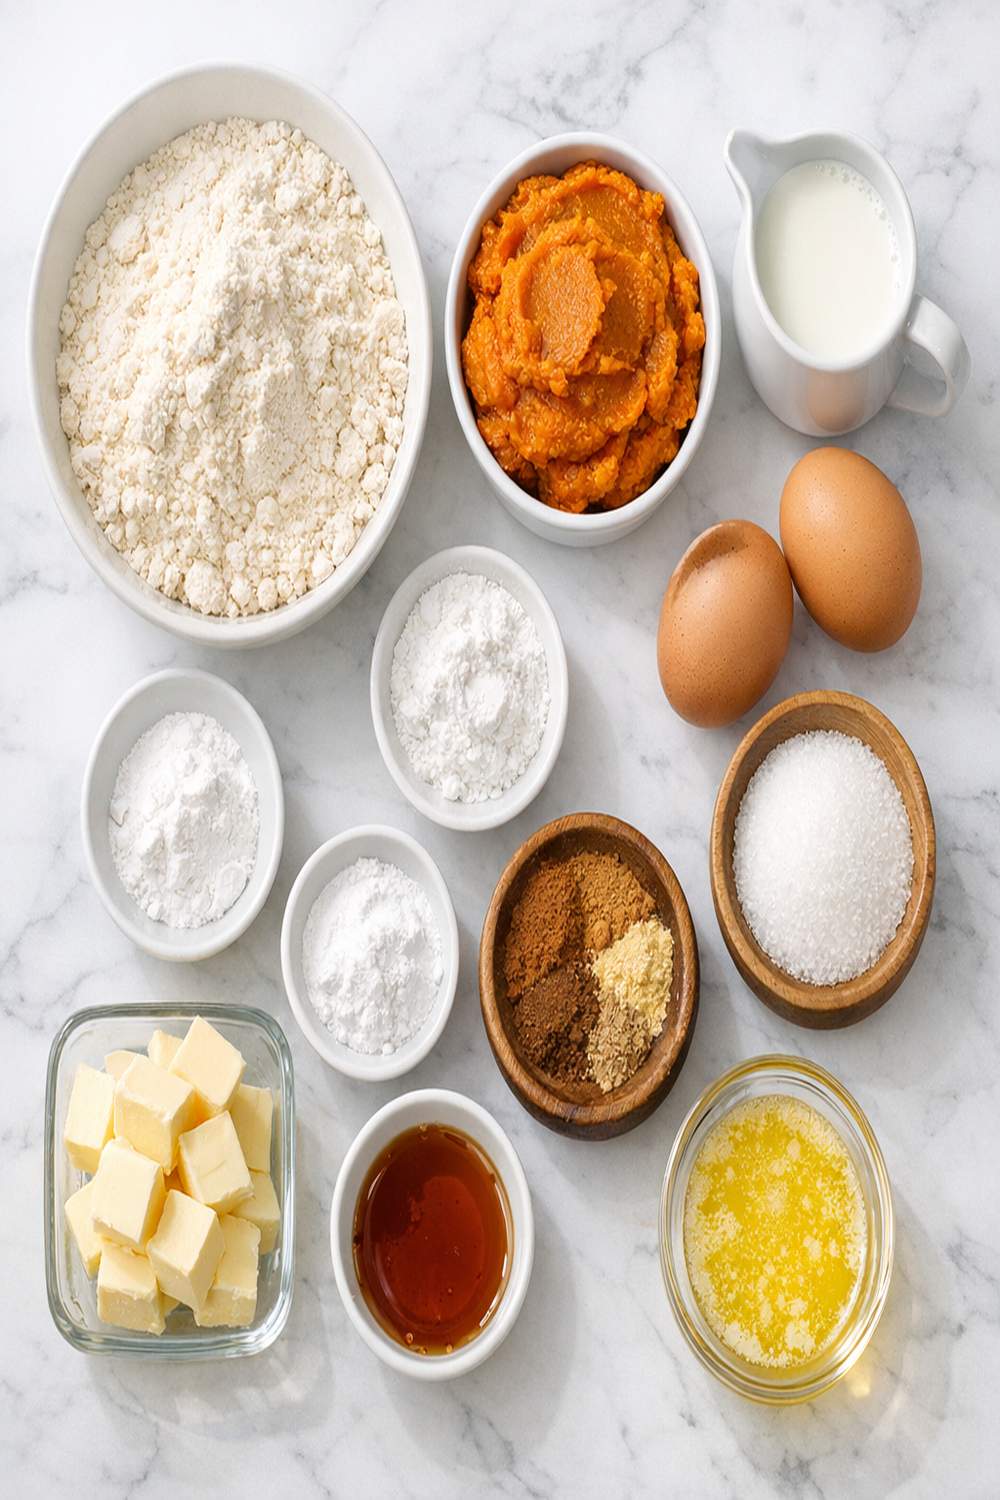
I’ve intentionally chosen ingredients that work together to create both flavor and nutritional value. Everything here serves a purpose—nothing is filler. This recipe makes about 12 pancakes, which feeds 4 people generously or gives you breakfast for two with leftovers to freeze.
- 2 teaspoons pumpkin pie spice blend (cinnamon, nutmeg, ginger, and clove combined)
- 2 teaspoons aluminum-free baking powder (ensures a light crumb)
- ¼ cup unsulfured molasses (adds deep flavor and iron; not to be confused with blackstrap)
- ¼ teaspoon ground ginger (fresh ginger flavor that pie spice alone can’t deliver)
- 1 tablespoon fresh lemon juice (brightens the spices and prevents them from tasting heavy)
- 3 tablespoons packed brown sugar (adds moisture and subtle molasses notes)
- 1 teaspoon pure vanilla extract (not imitation; the difference is noticeable)
- Butter or neutral oil for the pan (I prefer butter for flavor, but coconut oil works too)
- 2 large eggs (room temperature helps them incorporate smoothly)
- 1 cup pure pumpkin puree (canned is fine; avoid pumpkin pie filling which contains added sugar)
- 1 cup whole milk (full-fat creates a fluffier texture than low-fat)
- 2 cups baking mix (the base that makes this recipe foolproof)
How to Make Pumpkin Pancakes
I’m going to walk you through each step with the detail I wish I’d had when I first started cooking seriously. Pay attention to the sensory cues—they matter more than timing alone.
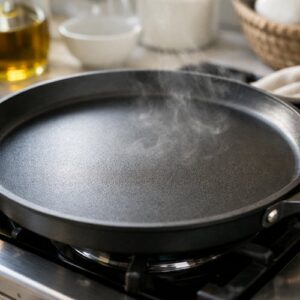
Step 1: Heat Your Pan to the Right Temperature
Set a large skillet or griddle over medium heat and let it warm for about 2 minutes. You’re aiming for medium, not medium-high—this is where most people rush and end up with burnt outsides and raw middles. The pan is ready when a drop of water sizzles gently (not violently) and evaporates in about 3 seconds. This takes patience, but it’s non-negotiable for even cooking.

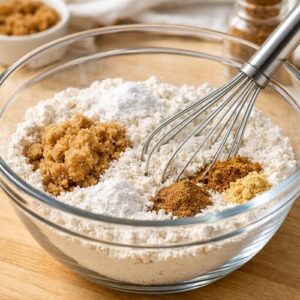
Step 2: Combine All Your Dry Ingredients
In a large mixing bowl, whisk together the baking mix, brown sugar, baking powder, pumpkin pie spice, and ground ginger. Use a whisk, not a spoon—this aerates the mixture and helps incorporate the leavening agents evenly. Whisk for about 20-30 seconds until everything looks uniform. I often sift this mixture through a fine-mesh strainer if I’m being extra careful about lumps, but whisking works beautifully too.

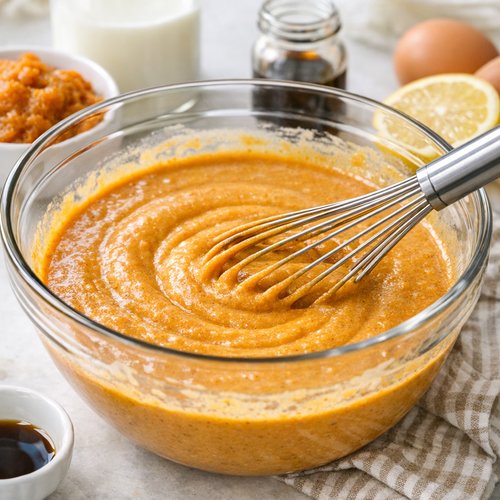
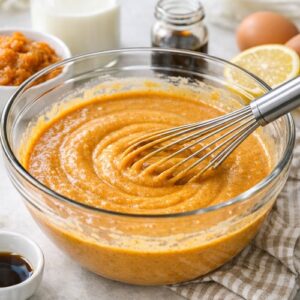
Step 3: Whisk Together the Wet Components
In a separate bowl, combine the pumpkin puree, milk, molasses, eggs, lemon juice, and vanilla extract. Whisk until completely smooth—about 1 minute. The molasses can be stubborn, so take your time here. The lemon juice will seem like an odd addition, but it brightens the heavy spices and prevents the pancakes from tasting flat or one-dimensional.
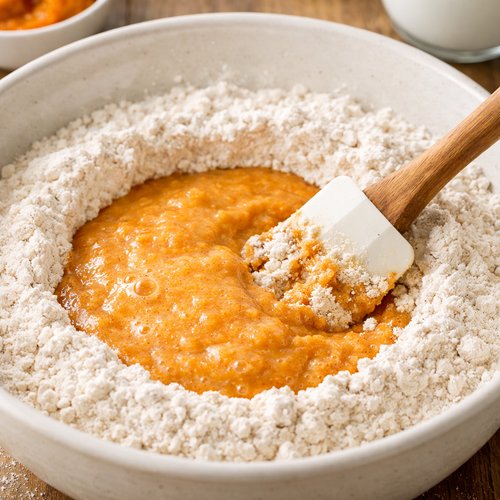
Step 4: Make a Well and Fold Together Gently
Create a well in the center of your dry ingredients and pour the wet mixture into it. Using a spatula or wooden spoon, fold the ingredients together with just 10-15 gentle strokes. Stop as soon as you no longer see flour streaks. Overmixing develops gluten, which makes pancakes tough and rubbery. Small lumps are your friend here—they disappear during cooking and result in a tender crumb.
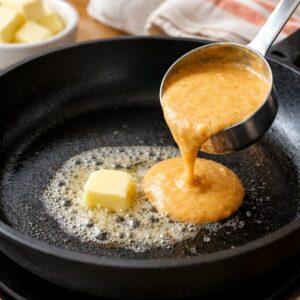
Step 5: Butter Your Pan and Ladle the Batter
Add a small pat of butter to your preheated pan and let it foam for about 10 seconds until it’s completely melted and the foam subsides. Using a ¼ cup measuring cup or ice cream scoop, pour batter onto the griddle. Space them about 2 inches apart. You should hear a gentle sizzle. Let them cook undisturbed for 2-3 minutes.

Step 6: Watch for Bubbles and Flip with Confidence
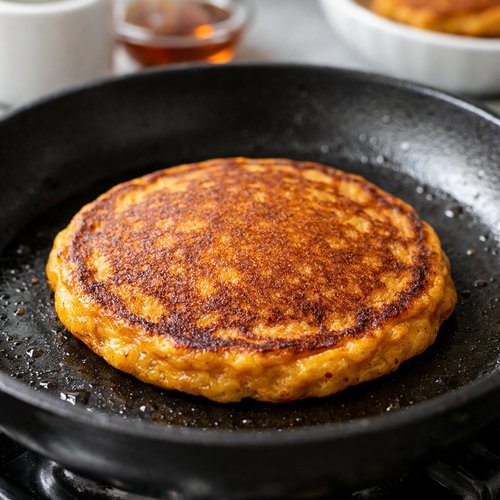
After about 2 minutes, the top surface will begin to bubble. Wait until the bubbles pop and the edges look set and slightly golden—this is usually around minute 3. Gently slide a spatula underneath one pancake to test: it should lift cleanly without tearing. If it sticks, wait 30 more seconds. When you flip, the bottom should be deep golden brown, almost caramel-colored. Don’t flip too early—this is the most common mistake I see.

Step 7: Cook the Second Side Until Golden
The second side cooks faster—usually just 1-2 minutes until the bottom is set and golden. These pancakes are done when they feel slightly firm to the touch and a toothpick inserted in the center comes out clean (if you’re unsure). Transfer to a warm plate. Keep finished pancakes warm in a 200°F oven while you cook the remaining batches.
Expert’s Nutritional Insight
As a registered dietitian, I want to highlight why the combination of molasses and pumpkin matters nutritionally. Molasses provides iron and mineral density that white sugar simply doesn’t offer. Paired with the beta-carotene in pumpkin and the chromium in cinnamon (which helps regulate blood sugar), this breakfast actually works with your metabolism instead of against it. One serving of these pancakes delivers about 8 grams of carbohydrates from real food, not refined starches alone. That’s the nutritional difference between a pancake that sustains you and one that leaves you hungry two hours later.
Tips and Tricks
- Don’t skip the lemon juice – It’s there to brighten spices and prevent the heavy molasses from overwhelming your palate. Trust the recipe.
- Use pure pumpkin puree, not pumpkin pie filling – Pie filling has added sugar and spices. You want to control the seasoning yourself. Read labels—there should be only one ingredient: pumpkin.
- Room temperature eggs incorporate better – Let eggs sit on the counter for 10 minutes before mixing. Cold eggs don’t blend smoothly with other wet ingredients.
- Make a double or triple batch for freezing – Cool pancakes completely on a wire rack, layer them between parchment paper, and freeze in a freezer bag for up to 3 months. Reheat in a 350°F toaster oven in about 5 minutes.
- The pan temperature is everything – Medium heat is your sweet spot. Too high and you get burnt outsides with raw centers. Too low and they become dense and take forever.
- Stir the batter between batches – The baking powder is always working, so the batter gets thicker and more dense the longer it sits. A quick stir adds air back in.
Common Mistakes to Avoid
- Overmixing the batter – This is the number one complaint I get. More mixing does not equal better pancakes. Those little lumps dissolve during cooking and create texture. Mix just until combined.
- Flipping too early – If you flip before the bubbles have popped and the edges look set, your pancake falls apart. Patience pays off here. The second side only needs 60-90 seconds.
- Using cold ingredients straight from the fridge – Especially the eggs. They don’t incorporate smoothly, which affects texture. Room temperature ingredients mix more evenly.
- Skipping the lemon juice – People often skip it thinking it’s unnecessary. It’s actually the ingredient that prevents these from tasting one-dimensional. It rounds out the spices beautifully.
Make-Ahead and Meal Prep Guide
Prepare the dry mix the night before: Whisk together the baking mix, brown sugar, baking powder, pumpkin pie spice, and ginger. Store in an airtight container. In the morning, combine your wet ingredients and fold together. This cuts your morning prep time in half.
Full batch freezing: Let cooked pancakes cool completely on a wire rack (not a plate—trapped steam makes them soggy). Layer between parchment paper and freeze in a freezer bag for up to 3 months. Reheat in a 350°F toaster oven for about 5 minutes, or use your regular toaster on a lower setting. They thaw and reheat beautifully without becoming rubbery.
Batter storage: Prepared batter keeps in the refrigerator for 24 hours maximum. After that, the leavening agents lose their power. If you’re meal prepping, I recommend freezing cooked pancakes rather than raw batter.
Can I Store Pumpkin Pancakes?
Yes, and they actually improve with a day of rest because the flavors deepen. Store cooled pancakes in an airtight container in the refrigerator for up to 5 days. Reheat gently in a 300°F oven for 8-10 minutes, or use your toaster oven set to a low setting.
For freezing: Cool pancakes completely, layer between parchment paper, and store in a freezer bag or airtight container for up to 3 months. The texture remains excellent. Reheat from frozen in a 350°F toaster oven for about 7-8 minutes, or pop them in your regular toaster on a lower setting.
The batter itself doesn’t freeze well because the leavening agents lose power. I always recommend cooking first, then freezing the finished pancakes.
Nutrition Information
Per pancake (based on 12 pancakes): approximately 145 calories, 4g protein, 24g carbohydrates, 2g dietary fiber, 3g fat, 12g sugar. According to USDA nutrition data for pumpkin puree, each serving delivers about 2,700 IU of vitamin A (54% of daily value) and significant potassium for heart health.
The real value here is in the quality of carbohydrates. These aren’t simple, refined carbs that spike blood sugar. The fiber from pumpkin, the molasses, and the eggs create a more stable glucose response. You’re getting sustained energy, not a spike and crash.
What to Serve With Pumpkin Pancakes
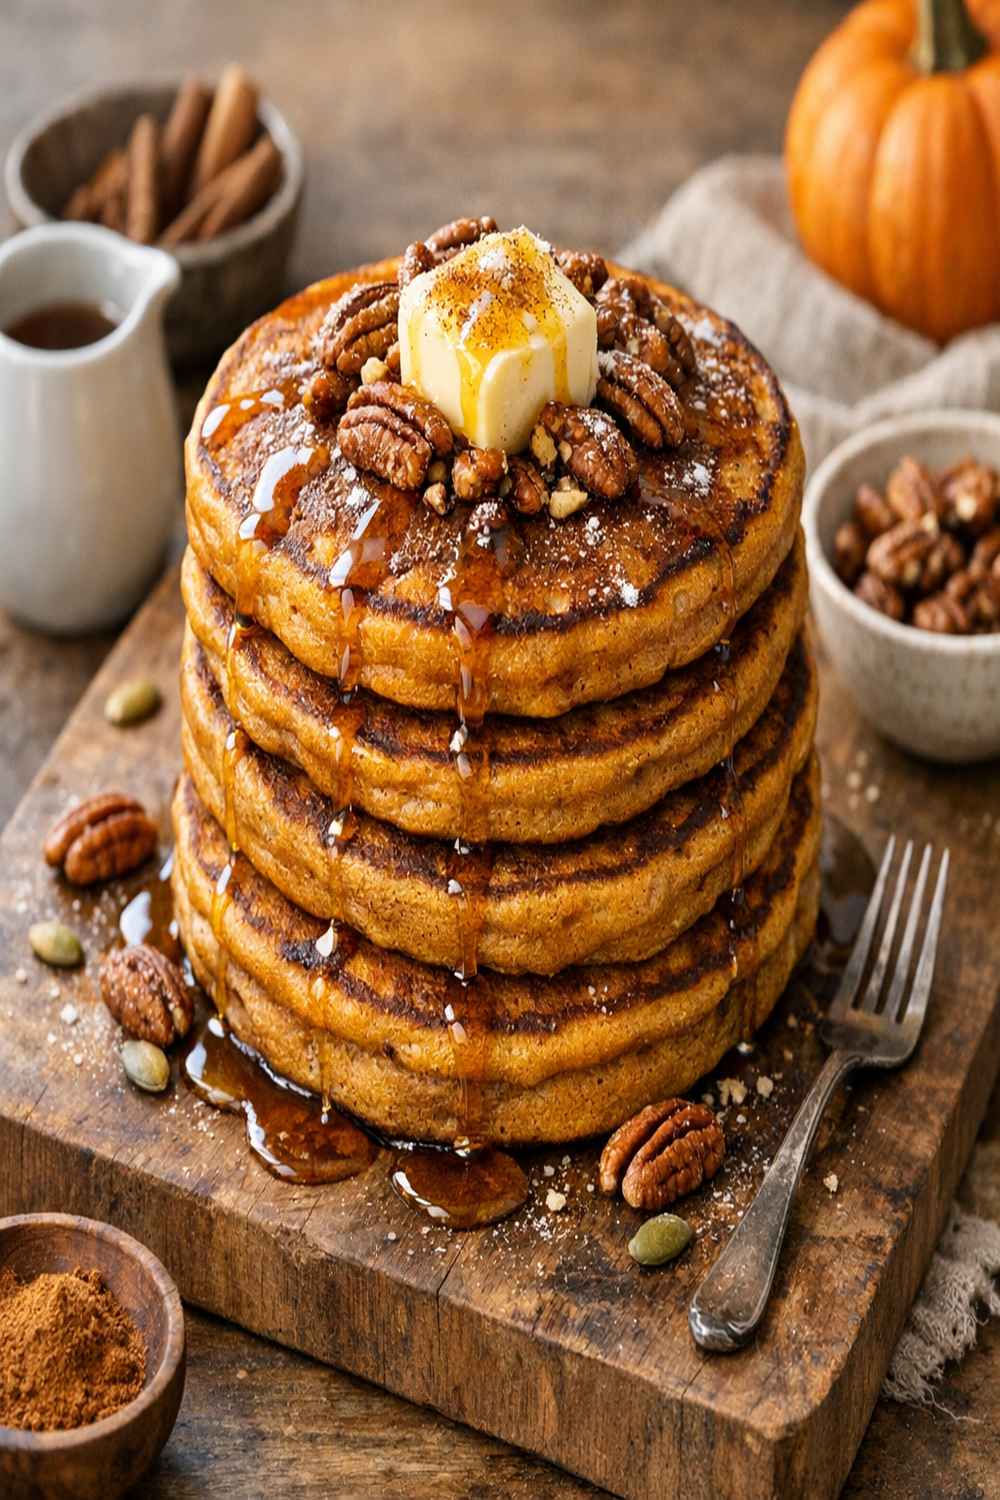
I never serve these plain. The toppings are where the enjoyment deepens. I love them with simple butter and pure maple syrup, but here’s what I actually reach for when I’m being thoughtful about nutrition:
- Greek yogurt and candied pecans – The tanginess of yogurt balances the sweet spices beautifully, and pecans add crunch and omega-3 fatty acids.
- Whipped cream and a drizzle of honey – Simple, classic, and the whipped cream adds richness without heaviness.
- Cream cheese and a small drizzle of maple syrup – The richness of cream cheese pairs perfectly with the spiced pumpkin. Go easy on the syrup.
- Salted butter and just a touch of maple syrup – Sometimes less is more. Let the pumpkin and spices shine.
If you’re looking for something more protein-forward to extend the meal, serve these pancakes alongside citrus shrimp avocado salad for a brunch that covers all your nutrient bases. Or pair with scrambled eggs and a side of sautéed greens for a balanced breakfast that actually keeps you full.
Seasonal Variations
Fall (September-November): This is the classic version. Use the recipe exactly as written. The spices and pumpkin are at their peak of freshness.
Winter (December-February): Add ½ teaspoon of cardamom and a pinch of clove. These warm spices feel more luxurious as the weather gets colder. Top with hot buttered rum sauce or a drizzle of warmed honey.
Spring (March-May): Swap half the pumpkin puree for sweet potato puree and reduce the molasses to 3 tablespoons. Add zest of one orange. These feel lighter and brighter as the season changes.
Summer (June-August): Honestly, these pancakes are inherently fall. But if you want a summery version, substitute butternut squash puree for pumpkin and reduce the pumpkin pie spice to 1 teaspoon. Add zest and juice of half a lemon. Serve chilled with whipped cream.
Substitutes and Variations
- Buttermilk instead of whole milk – Use the same amount. Buttermilk adds tang and helps pancakes brown more evenly. It’s a favorite swap of mine.
- Greek yogurt for half the milk – Combine ½ cup Greek yogurt with ½ cup milk. This adds protein and creates a slightly denser, more indulgent texture.
- Coconut sugar instead of brown sugar – Use the same measurement. The flavor is slightly earthier and less refined, but the result is delicious. Coconut sugar has a lower glycemic index.
- Maple syrup instead of molasses – Use ¼ cup pure maple syrup (not pancake syrup). The flavor will be lighter and more delicate. You lose some of the iron content, but gain a cleaner taste.
- Whole wheat pastry flour mixed in – Replace half the baking mix with whole wheat pastry flour. This adds nutty flavor and fiber, though pancakes will be slightly denser.
- Almond flour addition – Add 2 tablespoons almond flour to the dry ingredients. This adds richness and protein without changing the texture significantly.

Bisquick Pumpkin Pancakes Recipe
Ingredients
- 2 teaspoon pumpkin pie spice blend cinnamon, nutmeg, ginger, and clove combined
- 2 teaspoon aluminum-free baking powder ensures a light crumb
- ¼ cup unsulfured molasses adds deep flavor and iron; not to be confused with blackstrap
- ¼ teaspoon ground ginger fresh ginger flavor that pie spice alone can't deliver
- 1 tablespoon fresh lemon juice brightens the spices and prevents them from tasting heavy
- 3 tablespoon packed brown sugar adds moisture and subtle molasses notes
- 1 teaspoon pure vanilla extract not imitation; the difference is noticeable
- Butter or neutral oil for the pan I prefer butter for flavor, but coconut oil works too
- 2 large eggs room temperature helps them incorporate smoothly
- 1 cup pure pumpkin puree canned is fine; avoid pumpkin pie filling which contains added sugar
- 1 cup whole milk full-fat creates a fluffier texture than low-fat
- 2 cup baking mix the base that makes this recipe foolproof
Instructions
Step 1: Heat Your Pan to the Right Temperature
- Set a large skillet or griddle over medium heat and let it warm for about 2 minutes. You're aiming for medium, not medium-high—this is where most people rush and end up with burnt outsides and raw middles. The pan is ready when a drop of water sizzles gently (not violently) and evaporates in about 3 seconds. This takes patience, but it's non-negotiable for even cooking.
Step 2: Combine All Your Dry Ingredients
- In a large mixing bowl, whisk together the baking mix, brown sugar, baking powder, pumpkin pie spice, and ground ginger. Use a whisk, not a spoon—this aerates the mixture and helps incorporate the leavening agents evenly. Whisk for about 20-30 seconds until everything looks uniform. I often sift this mixture through a fine-mesh strainer if I'm being extra careful about lumps, but whisking works beautifully too.
Step 3: Whisk Together the Wet Components
- In a separate bowl, combine the pumpkin puree, milk, molasses, eggs, lemon juice, and vanilla extract. Whisk until completely smooth—about 1 minute. The molasses can be stubborn, so take your time here. The lemon juice will seem like an odd addition, but it brightens the heavy spices and prevents the pancakes from tasting flat or one-dimensional.
Step 4: Make a Well and Fold Together Gently
- Create a well in the center of your dry ingredients and pour the wet mixture into it. Using a spatula or wooden spoon, fold the ingredients together with just 10-15 gentle strokes. Stop as soon as you no longer see flour streaks. Overmixing develops gluten, which makes pancakes tough and rubbery. Small lumps are your friend here—they disappear during cooking and result in a tender crumb.

Step 5: Butter Your Pan and Ladle the Batter
- Add a small pat of butter to your preheated pan and let it foam for about 10 seconds until it's completely melted and the foam subsides. Using a ¼ cup measuring cup or ice cream scoop, pour batter onto the griddle. Space them about 2 inches apart. You should hear a gentle sizzle. Let them cook undisturbed for 2-3 minutes.
Step 6: Watch for Bubbles and Flip with Confidence
- After about 2 minutes, the top surface will begin to bubble. Wait until the bubbles pop and the edges look set and slightly golden—this is usually around minute 3. Gently slide a spatula underneath one pancake to test: it should lift cleanly without tearing. If it sticks, wait 30 more seconds. When you flip, the bottom should be deep golden brown, almost caramel-colored. Don't flip too early—this is the most common mistake I see.

Step 7: Cook the Second Side Until Golden
- The second side cooks faster—usually just 1-2 minutes until the bottom is set and golden. These pancakes are done when they feel slightly firm to the touch and a toothpick inserted in the center comes out clean (if you're unsure). Transfer to a warm plate. Keep finished pancakes warm in a 200°F oven while you cook the remaining batches.

Notes
Nutrition
FAQs
Can I Make This Recipe Without Canned Pumpkin?
You can use fresh roasted pumpkin puree if you have it, using the exact same measurement. However, you need to strain it well because fresh pumpkin is more watery than canned. I recommend roasting pumpkin, pureeing it in a food processor, then straining through cheesecloth for 2-3 hours before using. Canned pumpkin is actually more reliable for this recipe because it has consistent water content. That said, during pumpkin season, fresh tastes absolutely magical.
Why Is My Batter Too Thick?
Pumpkin puree varies in water content depending on the brand and how long it’s been opened. If your batter is too thick to pour (it should be pourable but not runny), add milk one tablespoon at a time until you reach the right consistency. Similarly, if it’s too thin and runs all over the griddle, add a tablespoon of baking mix and let it rest for 30 seconds.
Can I Use Self-Rising Flour Instead of Baking Mix?
Self-rising flour has salt and leavening already built in, whereas baking mix is slightly different. You’d need to omit the baking powder and salt if using self-rising flour. However, I recommend sticking with the baking mix as written because it’s specifically formulated for this type of recipe and gives the most reliable results.
What If I Don’t Have Pumpkin Pie Spice?
Make your own: combine 2 teaspoons ground cinnamon, ½ teaspoon ground ginger, ¼ teaspoon ground nutmeg, and ⅛ teaspoon ground cloves. This is actually fresher tasting than store-bought blends, and you control the proportions. You’ll already have ground ginger in the recipe, so this just ensures you have enough warmth and depth.
Can I Double This Recipe?
Absolutely, and I recommend it. Double everything and you’ll have about 24 pancakes. The method stays exactly the same. If you’re doubling, make sure your mixing bowls are large enough—doubling in a small bowl makes it harder to fold gently without overmixing.
How Do I Get Fluffier Pancakes?
Three things matter: don’t overmix the batter, use room temperature ingredients, and let the pan reach the correct temperature before cooking. Additionally, separating eggs (using just yolks in the batter and folding in whipped whites at the very end) creates incredibly fluffy pancakes, though it’s more work. For everyday cooking, following the recipe exactly as written gives you pancakes that are fluffy enough without the extra effort.
More Recipes You’ll Love
- Instant Pot Butternut Squash – A perfect side dish or addition to a fall brunch spread
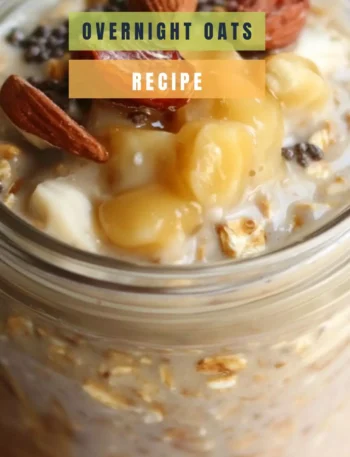
- Almond Butter Overnight Oats Recipe – Another make-ahead fall breakfast that pairs beautifully with these pancakes throughout the week
- Hot Buttered Rum – The perfect fall beverage to serve alongside a pumpkin pancake breakfast
- Trader Joe’s Overnight Oats Recipe – Another quick breakfast option when you’re rotating between different morning meals
Final Thoughts
These pumpkin pancakes are what I make when I want my family to feel cared for without spending hours in the kitchen. They’re substantial enough to fuel your morning, warming enough to feel like a hug, and simple enough to become a regular habit rather than a special occasion.
The beauty of this recipe is that it respects both convenience and nutrition. You’re using a trusted baking mix as your foundation, but you’re adding real food—actual pumpkin, molasses, fresh spices—that transforms it into something meaningful. That’s the cooking philosophy I’ve carried since watching my mom in that Jersey kitchen all those years ago.
Make a batch this weekend. Freeze the extras. Enjoy them on rushed mornings, pack them for brunch, serve them to people you love. That’s what food is really about. Enjoy your cooking!!
META DESCRIPTION: Easy pumpkin pancakes recipe using Bisquick mix, canned pumpkin, molasses, and autumn spices. Ready in 20 minutes with make-ahead freezing instructions.