Elaine Gordon
There’s nothing quite like opening a jar of homemade salsa on a winter evening—it tastes like summer in a spoon. This recipe is perfect alongside Authentic Mexican Chicken Taco Recipe or even our American Taco Recipe for a weeknight dinner that feels special. I’ve been canning this salsa for years, and it’s become one of my most-requested gifts.
My Kitchen Discovery: Why I Started Canning Salsa
Growing up in my family’s New Jersey kitchen, my mom would buy jars of salsa from the grocery store like clockwork. But one summer, my aunt Rosemary showed up with mason jars of her own homemade version—deep red, fragrant with garlic, and impossibly fresh-tasting. I was maybe twelve, and I remember tasting it and thinking: this is completely different. The flavors tasted alive in a way the store-bought version never did.
Years later, as a dietitian, I understood why. Commercial salsas often rely on preservatives and added sugars to achieve shelf stability. Rosemary’s version used proper canning techniques and whole ingredients, which meant the nutrition profile was completely different—more fiber from the tomatoes, actual nutrients intact because nothing was over-processed.
I became obsessed with learning her technique. Now, making homemade canned salsa is one of my favorite ways to preserve the harvest while keeping my pantry stocked with something genuinely nourishing.
What is Homemade Canned Salsa?
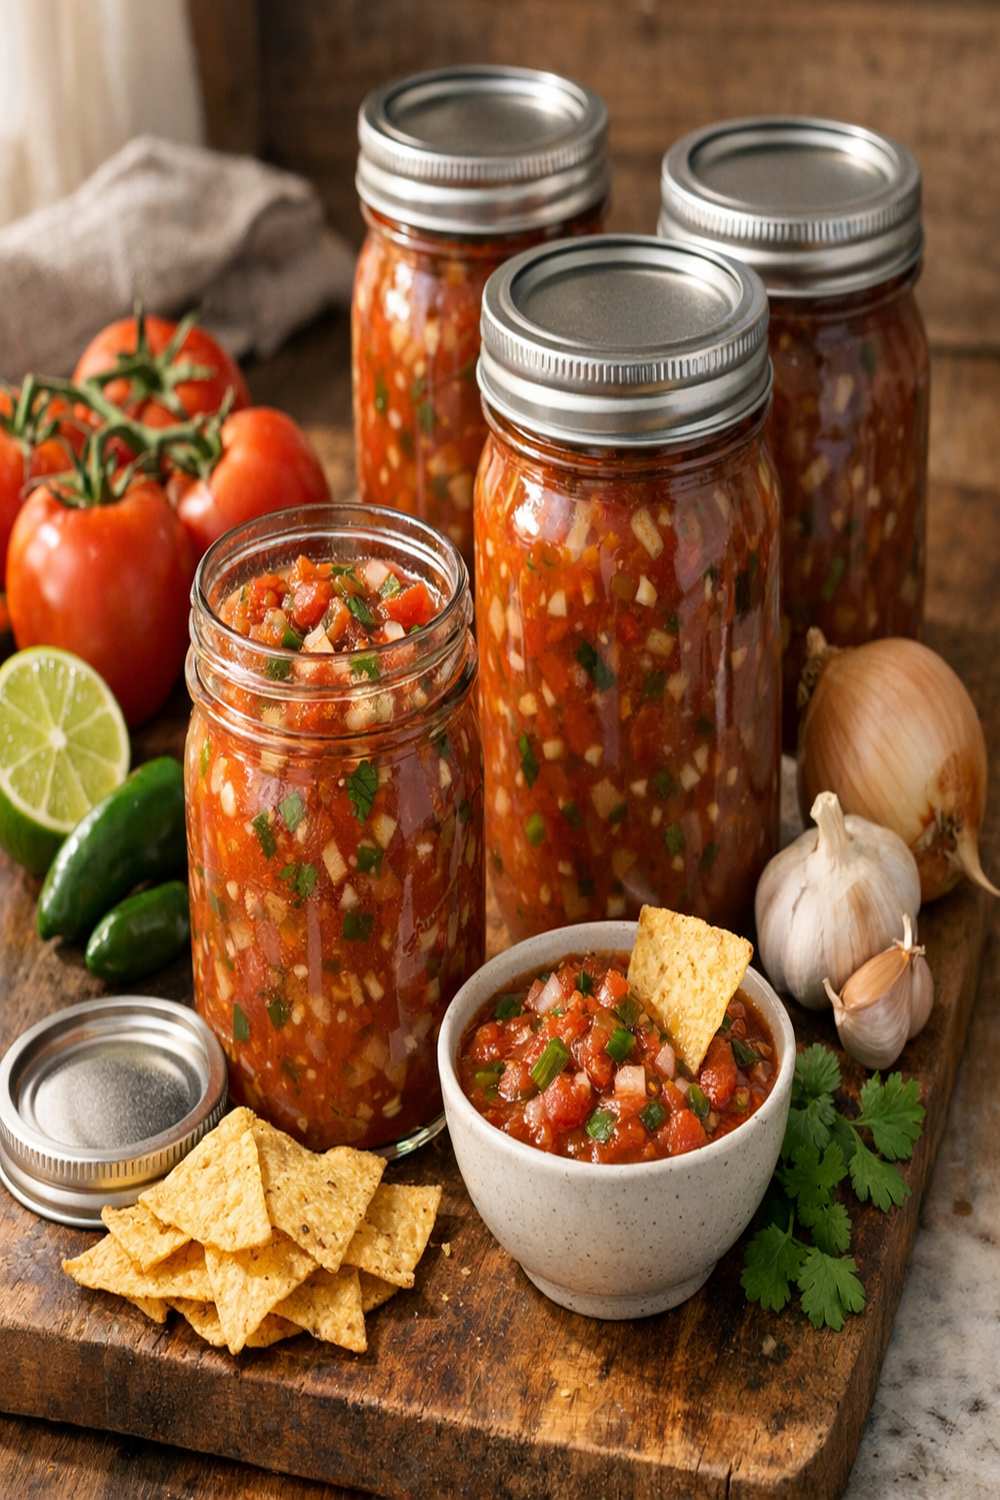
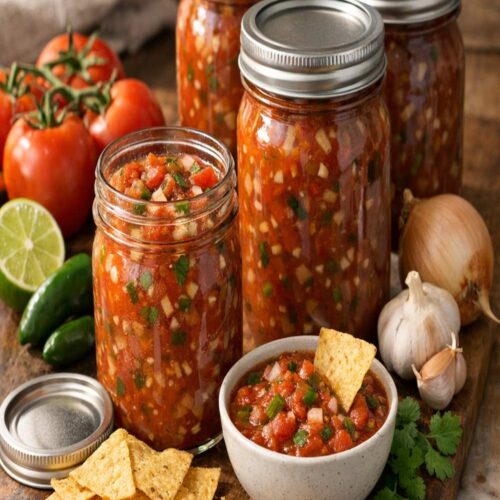
Homemade canned salsa is a fresh tomato sauce made from whole ingredients—chopped tomatoes, peppers, onions, and aromatics—that’s processed in a water bath canner to create shelf-stable jars. Unlike fresh salsa, which lasts only a few days in the refrigerator, properly canned salsa can last up to two years in your pantry.
The magic happens through a combination of acidity (vinegar) and salt, which work together to prevent bacterial growth and preserve the ingredients safely. This isn’t just an old-fashioned technique—it’s rooted in food safety science. The canning process heats the jars to a temperature that destroys pathogens, creating a sealed environment where your salsa stays fresh indefinitely.
What I love most is that canned salsa tastes so much brighter than store-bought versions. You’re working with fresh tomatoes at their peak, and the vinegar adds a clean tang that deepens over time. By the time you open a jar in January, the flavors have melded beautifully—it tastes intentional, not processed.
Why You’ll Love This Homemade Canned Salsa Recipe
- Control over ingredients – You know exactly what goes into every jar. No preservatives, no excess sodium, no mystery additives. As a dietitian, this matters to me tremendously because whole food is always more nutritious than processed versions.
- Superior flavor – Fresh tomatoes, real garlic, and a bright vinegar backbone create a salsa that tastes alive. The peppers stay distinct, the onions add sweetness, and nothing tastes one-dimensional.
- Year-round access – Make this during peak tomato season (late summer through early fall) when tomatoes are cheapest and most flavorful, then enjoy it throughout winter when fresh tomatoes are mealy and expensive.
- Perfect gift potential – Jars of homemade salsa are thoughtful, practical gifts that people genuinely use. I’ve given these to friends, family, and neighbors for years, and they always ask for more.
- Cost-effective – If you have access to tomatoes from a farmer’s market or garden, this recipe is incredibly economical. You’re making multiple jars for the price of a few store-bought versions.
- Satisfying preservation project – There’s genuine joy in creating something shelf-stable with your own hands. The pop of a sealed jar lid is incredibly rewarding.
The Ingredients
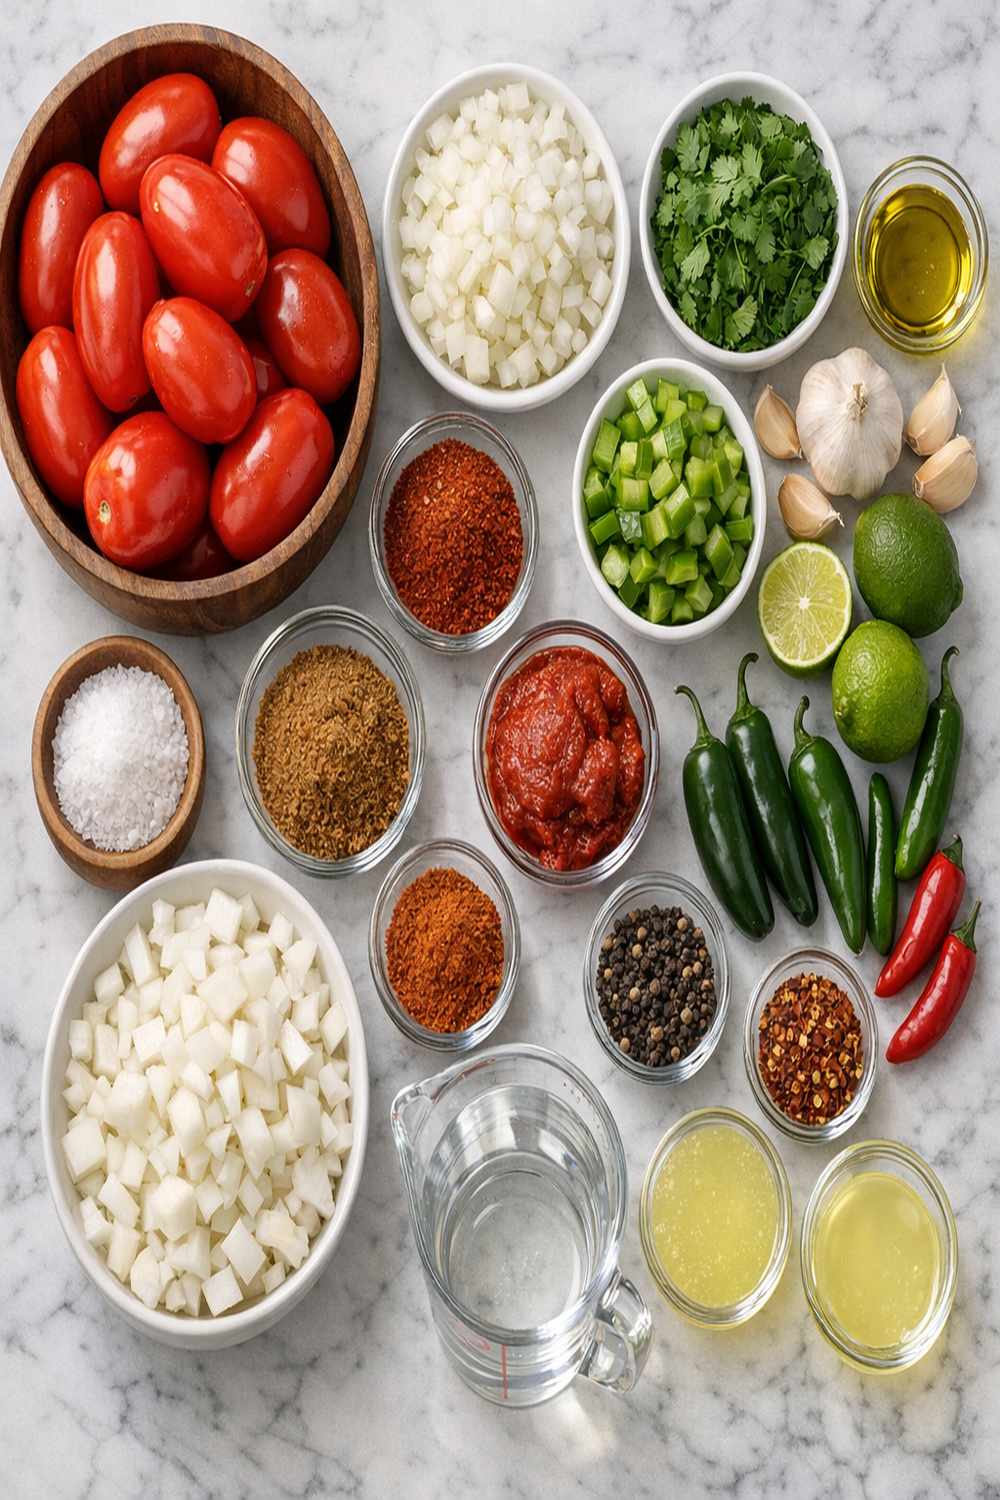
Here’s what you’ll need to make about six pint-sized jars of this salsa. I’ve organized these to show you the foundation of fresh produce, then the preserving components that keep everything safe and delicious. Quality matters here—choose the freshest ingredients you can find, especially the tomatoes.
- 1 12-ounce can tomato paste (concentrates flavor and adds body)
- 2½ cups white onion (finely diced, about 2 medium onions)
- 4 medium jalapeños (seeded and minced, adjust based on heat preference)
- ¼ teaspoon red pepper flakes (for subtle heat, adds complexity)
- 8 large garlic cloves (minced very finely)
- ½ teaspoon ground cumin (optional but adds authentic warmth)
- 1 cup white vinegar (5% acidity for proper preservation)
- 6 teaspoons pickling salt (kosher salt works if pickling salt isn’t available)
- 2½ cups green bell peppers (finely diced, about 2 large peppers)
- 9 cups fresh tomatoes (peeled and finely diced, about 12-14 medium Roma tomatoes)
Equipment You’ll Need
Beyond the ingredients, proper equipment is essential for safe canning. You’ll want a water bath canner (or large stockpot if you’re starting out), mason jars with two-part lids, a jar lifter, and a bubble remover tool. If you’re new to canning, I’d recommend investing in a basic canning kit—it costs about twenty dollars and makes the entire process safer and easier.
How to Make Homemade Canned Salsa
This recipe takes patience, but not much active cooking time. Plan about two hours total from prep through processing. The actual stovetop time is only about fifteen minutes, but preparation and cooling add to the timeline.
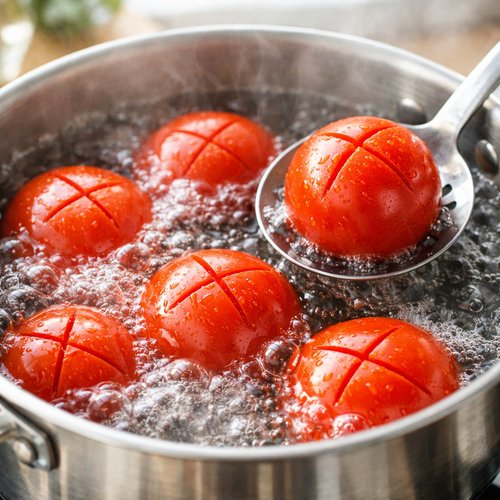
Step 1: Prepare Your Tomatoes
Start by bringing a large pot of water to a rolling boil. Score the bottom of each tomato with a small X, then carefully place them into the boiling water in batches. You’re looking for the skins to begin splitting—this takes about 30 seconds to 1 minute. Remove them with a slotted spoon and place them into an ice bath to stop the cooking.
Once cooled, the skins should slip off easily. Discard the skins, then coarsely chop the tomatoes. You should have about 9 cups of chopped tomato. Place them in a large colander over a bowl and let them drain for about 15 minutes—this removes excess liquid and helps your salsa have better texture.
Step 2: Prepare All Vegetables
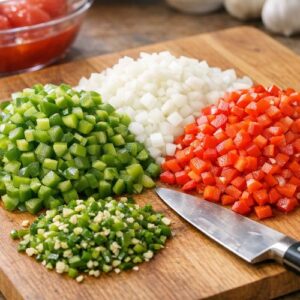
While your tomatoes drain, dice your bell peppers and onions into small, consistent pieces—about the size of a pea or slightly larger. Mince your jalapeños very finely, and if you prefer milder salsa, remove the seeds and white membranes where most of the heat lives. Mince your garlic so finely it’s almost paste-like; this helps it distribute evenly and prevents large pieces in the finished salsa.
Having everything prepped before you start cooking is key. This is what professional cooks call mise en place—everything in its place—and it keeps you calm and organized when you’re managing multiple ingredients.

Step 3: Prepare Your Jars and Equipment
Before you combine anything, prepare your canning jars. Run them through your dishwasher on the hottest setting, or wash them by hand in very hot soapy water and rinse thoroughly. Place them upright on a clean kitchen towel. In a small saucepan, cover your new lids with just-boiled water and let them sit until you’re ready to use them—this softens the rubber seal and ensures a tight seal after processing.
Fill your water bath canner with enough water to cover jars by about 1 inch and bring it to a simmer. You want it hot but not at a rolling boil yet—you’ll bring it to a full boil once your jars are loaded.

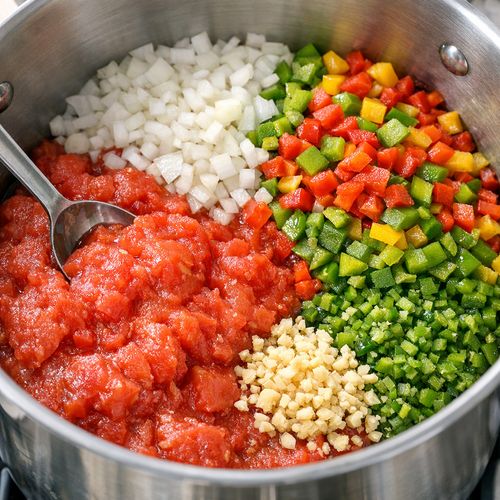
Step 4: Combine and Cook the Salsa Base
In a large, heavy-bottomed pot (at least 8-quart capacity), add your drained tomatoes, diced bell peppers, diced onions, minced jalapeños, minced garlic, tomato paste, white vinegar, and pickling salt. Add the cumin and red pepper flakes if using.
Stir everything together over medium-high heat. You’re looking for the mixture to come to a gentle simmer. Once it begins to bubble, reduce heat to medium and let it simmer for exactly 15 minutes, stirring occasionally. The salsa should reduce slightly and deepen in color. You’re not trying to cook it down significantly—you want to maintain the fresh vegetable texture while ensuring everything is heated through and the flavors meld.
Taste and adjust salt if needed. Remember that canned products always taste less seasoned once they cool, so err toward slightly over-seasoned rather than under.
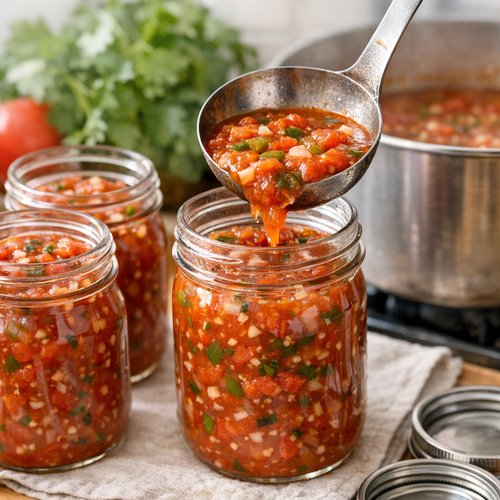
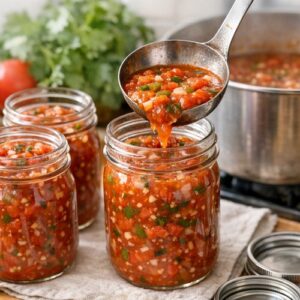
Step 5: Fill Your Jars
Working quickly, ladle your hot salsa into your prepared jars, leaving ½ inch of headspace at the top. This space is crucial—it allows room for the contents to expand during processing and helps create a proper seal. Use a bubble remover tool (or a clean chopstick) to run around the inside of each jar to remove any trapped air pockets.
Wipe the rim of each jar with a clean, damp cloth to remove any drips. Place a hot lid on each jar, then screw the band on finger-tight—firm but not locked down hard. You want the band snug enough that it won’t fall off, but not so tight that steam can’t escape during processing.
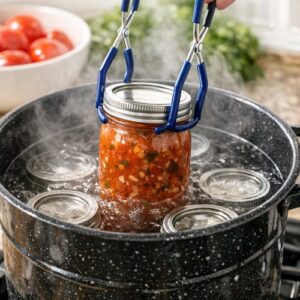
Step 6: Process in Water Bath
Carefully place your filled jars into your canning pot using a jar lifter, making sure they sit upright and are completely covered by hot water by at least 1 inch. Bring the water to a rolling boil and maintain a steady boil for 15 minutes. (If you’re above 1,000 feet elevation, add 1 minute processing time for each 1,000 feet.)
The boiling water will bubble vigorously around your jars—this is exactly what you want. The heat penetrates the jars, kills any microorganisms, and causes the lids to seal.
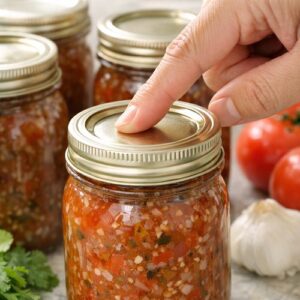
After 15 minutes, carefully remove the jars using a jar lifter and place them on a clean kitchen towel to cool completely. Do not tighten the bands or move the jars around while they cool. You should hear a satisfying pop as each jar seals—that’s the sound of safety and success. This usually happens within 30 minutes.

Step 7: Cool and Check Seals
Once the jars are completely cool (usually after several hours or overnight), check the seals by pressing down on the center of each lid. A properly sealed lid should be concave (dipped down) and shouldn’t flex or pop when you press it. If any lids are still popping up, it means they didn’t seal—you’ll need to either refrigerate those jars and use them within two weeks, or reprocess them with new lids.
Remove the bands, wipe the jars clean, and label them with the contents and date. Store in a cool, dark place—your pantry is perfect.

Expert’s Nutritional Tip
As a dietitian, I want you to understand why this salsa is so valuable nutritionally. Those tomatoes you’re starting with contain lycopene, a powerful antioxidant that’s actually more bioavailable when tomatoes are cooked. The gentle 15-minute simmer I recommend increases your body’s ability to absorb lycopene compared to fresh salsa. That said, you’re still preserving most of the vitamin C, fiber, and minerals because you’re using whole ingredients and a relatively gentle heat.
The vinegar isn’t just for preservation—it also helps your body absorb minerals like iron from the peppers and onions. If you have blood sugar concerns, the fiber from the tomatoes and peppers helps moderate glucose response, making this salsa a metabolically smart condiment.
Tips and Tricks
- Choose the right tomatoes – Roma tomatoes are ideal for canning because they have fewer seeds and less water content than beefsteak varieties. They’re also cheaper in season. Look for firm, ripe tomatoes without soft spots.
- Don’t skip the tomato paste – This ingredient serves multiple purposes. It adds concentrated tomato flavor, increases acidity slightly for safety, and creates body so your salsa isn’t watery. Don’t think you can just use more fresh tomatoes as a substitute.
- Invest in proper equipment – A jar lifter prevents burns and broken jars. A bubble remover ensures air pockets don’t create weak spots. These tools cost next to nothing but make the process infinitely safer and less stressful.
- Use vinegar at proper acidity – Check your vinegar bottle to ensure it’s 5% acidity. This is crucial for safety. Homemade vinegar or vinegar of unknown acidity can compromise the preservation process.
- Keep detailed notes – Write down exactly what you changed (more garlic, less salt, added cilantro) so you can recreate your favorite version next year. Over time, you’ll develop your perfect recipe.
- Don’t double the recipe in one batch – I know it’s tempting, but canning recipes have been tested at specific quantities. Doubling can change cooking time and safety parameters. Make two batches instead.
Can I Store Homemade Canned Salsa?
Properly sealed and stored canned salsa lasts up to two years in a cool, dark place. Your pantry, a basement shelf, or a kitchen cabinet away from direct sunlight all work well. Keep them out of extreme temperature fluctuations—don’t store them above your stove or near a heating vent.
Once you open a jar, salsa will keep in the refrigerator for about one week. Keep the opened jar covered, and don’t let it sit at room temperature for more than two hours.
If you ever see signs of spoilage—unusual cloudiness, mold, off smells, or bulging lids—discard the entire jar. This rarely happens with proper technique, but it’s better to be cautious with any canned food.
Nutrition Information
Per ¼-cup serving (about 2 tablespoons), this salsa contains approximately 15 calories, 0.2g fat, 3.5g carbohydrates, 0.8g fiber, 0.6g protein, and 320mg sodium. These values are based on USDA nutrition data for fresh tomatoes, peppers, and vinegar.
What I love about these numbers is the fiber-to-calorie ratio. You’re getting meaningful fiber for virtually no caloric cost, plus the natural sugars in tomatoes are balanced by fiber and acidity, which moderates blood sugar impact. The sodium comes from the salt needed for preservation and safety, but a quarter cup of salsa on your taco contains about 320mg—well within reasonable limits.
What Can I Serve With Homemade Canned Salsa?
This salsa is incredibly versatile. Obviously, it’s divine with tortilla chips, but I use it on so much more. Spoon it over Avocado Chicken Healthy Recipe for a bright, fresh topping. Use it as a base for enchiladas, mix it into scrambled eggs, or dollop it on a loaded baked potato.
- Tacos – Whether you’re making fish tacos, pulled pork, or simple bean tacos, this salsa elevates everything. The acidity cuts through richness beautifully.
- Rice and bean bowls – Layer it over cilantro-lime rice and black beans for a quick lunch. Add avocado, cheese, and a squeeze of lime for complete nutrition.
- Grilled chicken or fish – Use it as a topping for grilled protein. The fresh vegetables add nutritional density and flavor complexity.
- Vegetable soups – Stir a spoonful into tomato soup or tortilla soup for depth and brightness.
- Nachos – Layer it with cheese and baked tortilla chips for a crowd-pleasing appetizer that’s far better than store-bought versions.
- Breakfast eggs – Scrambled eggs, omelets, or breakfast burritos all benefit from a spoonful of this salsa.
- Cottage cheese topping – If you eat cottage cheese, a dollop of fresh salsa transforms it into a protein-packed snack.
Make-Ahead Guide and Meal Prep
The entire beauty of this recipe is that it’s the ultimate make-ahead ingredient. I typically make a large batch in late August or early September when tomatoes are peak season and inexpensive. I’ll make 12 to 18 jars in a single afternoon, which gives me salsa through the following spring.
Here’s my process: I prep all vegetables in the morning—tomatoes blanched and peeled, peppers and onions diced, garlic minced. I store everything in separate containers in the refrigerator. Then in the afternoon, I combine and cook everything, which takes about an hour of actual stovetop time. This way, my kitchen isn’t overwhelmed by heat and mess all at once.
If you’re making this as a smaller batch, you can prep vegetables the day before. Just keep everything covered and refrigerated. The cooking step needs to happen the same day you do the water bath processing, so plan for that.
I also recommend labeling your jars not just with the date, but with any variations you made. “Classic Version,” “Extra Garlic,” “Mild (No Jalapeños)”—this helps you remember what you liked best for next year.
Common Mistakes to Avoid
- Using overripe or underripe tomatoes – Both compromise flavor and texture. Overripe tomatoes become mushy; underripe ones taste flat. Choose tomatoes that yield slightly to pressure but aren’t soft.
- Overcooking the salsa – More than 15 minutes of simmering breaks down the vegetables too much and kills the fresh taste. You’re preserving, not creating a sauce that’s been simmering for hours.
- Skipping the headspace – If you fill jars too full, product can escape during processing, preventing a seal. If you leave too much headspace, air remains in the jar and can allow spoilage. Exactly ½ inch is correct.
- Processing at too high an altitude without adjustment – If you live above 1,000 feet elevation, you must add processing time. Water boils at a lower temperature in higher elevations, so processing time increases. Check USDA guidelines for your specific altitude.
Seasonal Variations
Once you master the basic recipe, you can adapt it seasonally. In late summer when cilantro is fresh and abundant, add ½ cup fresh cilantro at the very end—stir it in after cooking so it stays bright and aromatic. In fall, when cumin and deeper spices feel right, increase cumin to 1 teaspoon and add a pinch of smoked paprika for complexity.
If red tomatoes aren’t quite in season but yellow or heirloom tomatoes are, use them. You’ll get slightly different flavor notes—yellow tomatoes are less acidic and more delicate, heirlooms are often richer and more complex.
I don’t recommend making major substitutions (like using green tomatoes or removing peppers), as these affect the acidity and safety profile of your salsa. But working within the framework of the recipe with seasonal variations keeps things interesting year to year.
Substitutes
- Red bell peppers instead of green – These are sweeter and create a more mellow salsa. Red peppers cost more, so I usually mix half red and half green for a balance of flavor and economics.
- Serrano peppers instead of jalapeños – If you like more heat, serranos are genuinely spicier. Use the same quantity. If you want less heat, use fewer jalapeños or remove all seeds and membranes.
- Apple cider vinegar instead of white – This works, but choose one that’s 5% acidity and understand that the flavor will be slightly earthier and less bright. I prefer white vinegar for this recipe, but apple cider works in a pinch.
- Kosher salt instead of pickling salt – Pickling salt has no additives and dissolves easily. Kosher salt works but may not dissolve quite as smoothly. Don’t use iodized table salt—the iodine can discolor your salsa and affect flavor.
Homemade Salsa To Can Recipe
Ingredients
- 1 12- ounce can tomato paste concentrates flavor and adds body
- 2½ cup white onion finely diced, about 2 medium onions
- 4 medium jalapeños seeded and minced, adjust based on heat preference
- ¼ teaspoon red pepper flakes for subtle heat, adds complexity
- 8 large garlic cloves minced very finely
- ½ teaspoon ground cumin optional but adds authentic warmth
- 1 cup white vinegar 5% acidity for proper preservation
- 6 teaspoon pickling salt kosher salt works if pickling salt isn't available
- 2½ cup green bell peppers finely diced, about 2 large peppers
- 9 cup fresh tomatoes peeled and finely diced, about 12-14 medium Roma tomatoes
Instructions
Step 1: Prepare Your Tomatoes
- Start by bringing a large pot of water to a rolling boil. Score the bottom of each tomato with a small X, then carefully place them into the boiling water in batches. You're looking for the skins to begin splitting—this takes about 30 seconds to 1 minute. Remove them with a slotted spoon and place them into an ice bath to stop the cooking. Once cooled, the skins should slip off easily. Discard the skins, then coarsely chop the tomatoes. You should have about 9 cups of chopped tomato. Place them in a large colander over a bowl and let them drain for about 15 minutes—this removes excess liquid and helps your salsa have better texture.

Step 2: Prepare All Vegetables
- While your tomatoes drain, dice your bell peppers and onions into small, consistent pieces—about the size of a pea or slightly larger. Mince your jalapeños very finely, and if you prefer milder salsa, remove the seeds and white membranes where most of the heat lives. Mince your garlic so finely it's almost paste-like; this helps it distribute evenly and prevents large pieces in the finished salsa. Having everything prepped before you start cooking is key. This is what professional cooks call mise en place—everything in its place—and it keeps you calm and organized when you're managing multiple ingredients.
Step 3: Prepare Your Jars and Equipment
- Before you combine anything, prepare your canning jars. Run them through your dishwasher on the hottest setting, or wash them by hand in very hot soapy water and rinse thoroughly. Place them upright on a clean kitchen towel. In a small saucepan, cover your new lids with just-boiled water and let them sit until you're ready to use them—this softens the rubber seal and ensures a tight seal after processing. Fill your water bath canner with enough water to cover jars by about 1 inch and bring it to a simmer. You want it hot but not at a rolling boil yet—you'll bring it to a full boil once your jars are loaded.

Step 4: Combine and Cook the Salsa Base
- In a large, heavy-bottomed pot (at least 8-quart capacity), add your drained tomatoes, diced bell peppers, diced onions, minced jalapeños, minced garlic, tomato paste, white vinegar, and pickling salt. Add the cumin and red pepper flakes if using. Stir everything together over medium-high heat. You're looking for the mixture to come to a gentle simmer. Once it begins to bubble, reduce heat to medium and let it simmer for exactly 15 minutes, stirring occasionally. The salsa should reduce slightly and deepen in color. You're not trying to cook it down significantly—you want to maintain the fresh vegetable texture while ensuring everything is heated through and the flavors meld. Taste and adjust salt if needed. Remember that canned products always taste less seasoned once they cool, so err toward slightly over-seasoned rather than under.

Step 5: Fill Your Jars
- Working quickly, ladle your hot salsa into your prepared jars, leaving ½ inch of headspace at the top. This space is crucial—it allows room for the contents to expand during processing and helps create a proper seal. Use a bubble remover tool (or a clean chopstick) to run around the inside of each jar to remove any trapped air pockets. Wipe the rim of each jar with a clean, damp cloth to remove any drips. Place a hot lid on each jar, then screw the band on finger-tight—firm but not locked down hard. You want the band snug enough that it won't fall off, but not so tight that steam can't escape during processing.
Step 6: Process in Water Bath
- Carefully place your filled jars into your canning pot using a jar lifter, making sure they sit upright and are completely covered by hot water by at least 1 inch. Bring the water to a rolling boil and maintain a steady boil for 15 minutes. (If you're above 1,000 feet elevation, add 1 minute processing time for each 1,000 feet.) The boiling water will bubble vigorously around your jars—this is exactly what you want. The heat penetrates the jars, kills any microorganisms, and causes the lids to seal. After 15 minutes, carefully remove the jars using a jar lifter and place them on a clean kitchen towel to cool completely. Do not tighten the bands or move the jars around while they cool. You should hear a satisfying pop as each jar seals—that's the sound of safety and success. This usually happens within 30 minutes.
Step 7: Cool and Check Seals
- Once the jars are completely cool (usually after several hours or overnight), check the seals by pressing down on the center of each lid. A properly sealed lid should be concave (dipped down) and shouldn't flex or pop when you press it. If any lids are still popping up, it means they didn't seal—you'll need to either refrigerate those jars and use them within two weeks, or reprocess them with new lids. Remove the bands, wipe the jars clean, and label them with the contents and date. Store in a cool, dark place—your pantry is perfect.
Notes
Nutrition
FAQs
Can I make this salsa without canning—just refrigerate it?
Absolutely. If you skip the water bath processing step, you’ll have fresh salsa that keeps refrigerated for about one week. Just follow all the steps through cooking, then let it cool and refrigerate it in airtight containers. It won’t have the shelf stability of canned salsa, but it will still taste delicious. This is perfect if you don’t have canning equipment or you’re interested in making salsa for immediate use.
What if my jars didn’t seal?
Don’t panic. If a jar didn’t seal, you have two options: refrigerate it immediately and use it within two weeks, or reprocess it. To reprocess, remove the band and lid, check that the jar rim is clean, place a fresh hot lid on top, screw the band on, and process it again for the full 15 minutes. Sometimes a lid just wasn’t seated properly the first time. After the second processing, most jars seal.
Can I use frozen tomatoes or tomato juice to make this?
Frozen tomatoes will work—thaw them first and drain excess liquid. However, tomato juice is too dilute and won’t have the right texture or concentration of solids. Canned whole tomatoes can work, but fresh tomatoes taste noticeably better. If you’re making this outside of tomato season, frozen is your best option for flavor.
Is this salsa safe for people with botulism concerns or compromised immune systems?
Yes, when made with proper canning techniques. The combination of acidity (vinegar), salt, and proper heat processing makes this extremely safe. Botulism is an anaerobic bacterium that cannot grow in acidic environments. However, if anyone in your household has a severely compromised immune system, they should consult their doctor about any home-canned foods.
Can I pressure can this instead of water bath canning?
Water bath canning is actually safer and more appropriate for high-acid foods like salsa. Pressure canning is necessary only for low-acid foods. Since salsa contains vinegar and tomatoes (both acidic), water bath is the correct method. Using pressure canning on high-acid foods isn’t harmful, but it’s unnecessary.
More Recipes You’ll Love
- Authentic Mexican Chicken Taco Recipe – Perfectly seasoned chicken that’s delicious with homemade salsa as a topping or component.
- Avocado Chicken Healthy Recipe – Creamy, protein-rich, and absolutely transformed by a dollop of fresh salsa on top.
- American Taco Recipe – Classic taco assembly that becomes special when you’re using homemade salsa instead of store-bought.
There’s something genuinely satisfying about opening your pantry in January and pulling out a jar of salsa that tastes like peak summer. You created that. Your hands prepared those vegetables, your care guided them through the canning process, and your pantry now holds shelf-stable nutrition that tastes infinitely better than anything you could buy.
Making homemade canned salsa connects you to generations of home cooks who understood that preserving food is an act of care—care for your family’s health, care for your budget, care for flavor itself. My aunt Rosemary taught me that lesson with her mason jars, and now I’m sharing it with you.
Start with one batch this year. Pay attention to what you love about the process and the finished product. Adjust next year based on what you learned. Before long, you’ll have your own perfect version, and you’ll be the one people ask for jars of salsa.
Enjoy your cooking!!