Elaine Gordon
I grew up watching my mom pull crusty loaves from the oven on Sunday afternoons, the whole house filling with that unmistakable warm-bread smell. When I became a dietitian, I thought I’d have to let that joy go—especially when clients asked me about reducing carbohydrates. But this bread changed everything for me. It pairs beautifully with my favorite salad for lunch, or alongside Asian Tacos Recipe for dinner. Finally, I could give people real bread again—one that honors both flavor and their health goals.
The Bread That Brings Back Real Mornings
I’ll be honest: the first time someone told me they wanted to eliminate bread from their diet for blood sugar management, I felt a little sad for them. Bread isn’t just food—it’s ritual, comfort, tradition. So I started experimenting in my kitchen with whole-grain alternatives, nut flours, and binding agents until I landed on something that actually tasted like bread and felt like bread, not a dense brick masquerading as a loaf.
My family was skeptical at first. My husband took one bite and said, “This isn’t what I expected.” Two slices later, he was asking for seconds. That’s when I knew I had something special.
What Is Carbohydrate Free Bread?
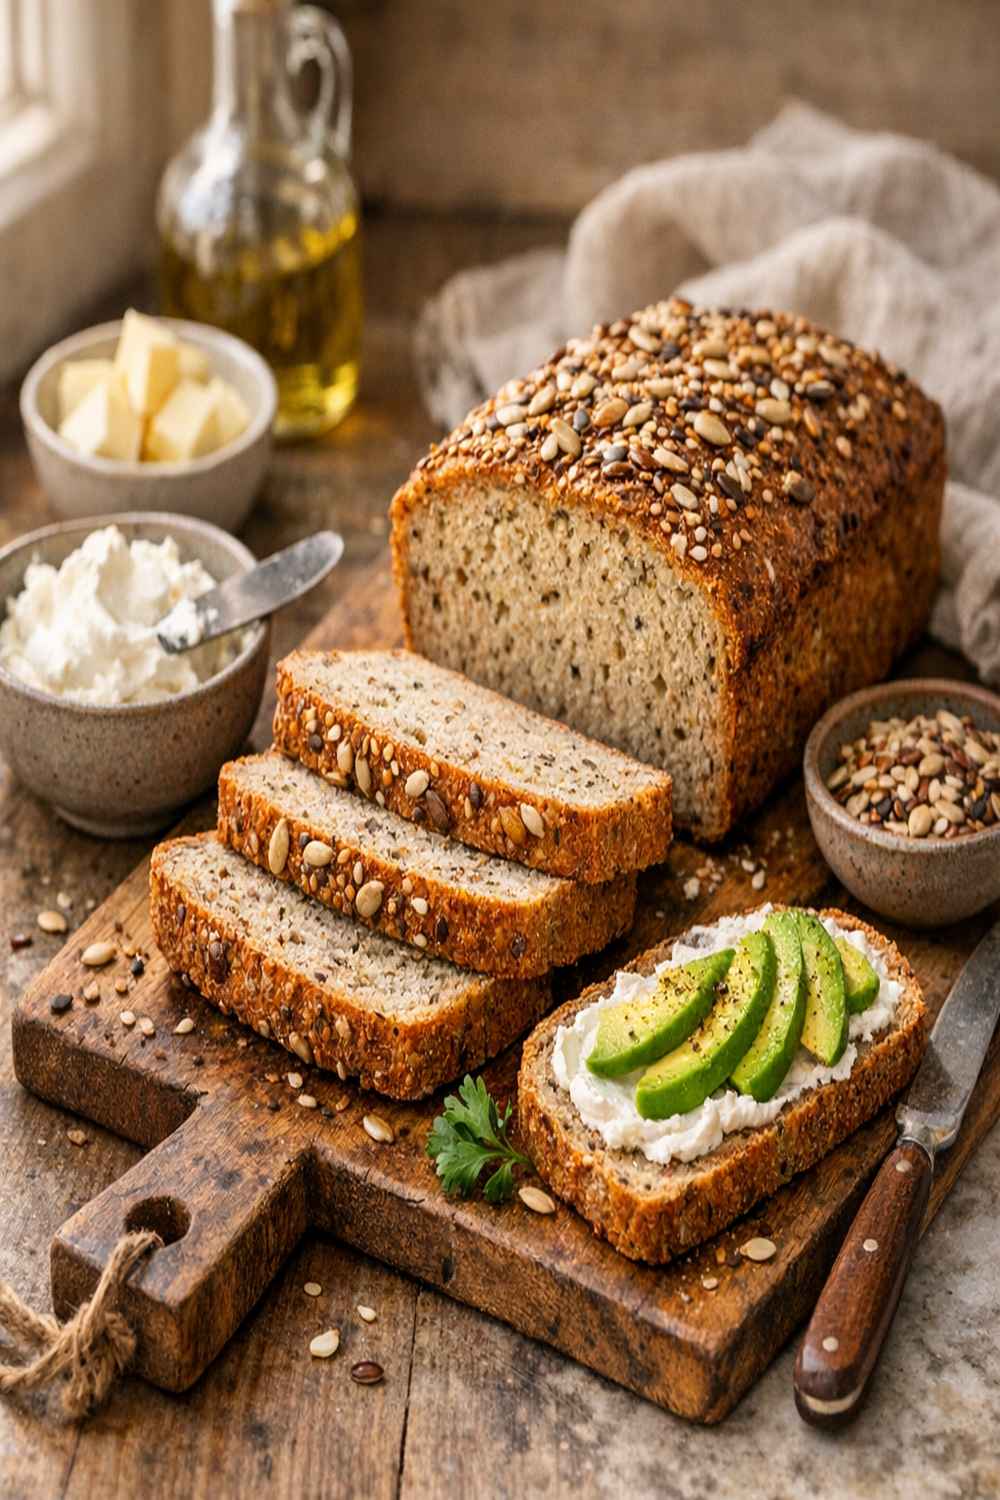
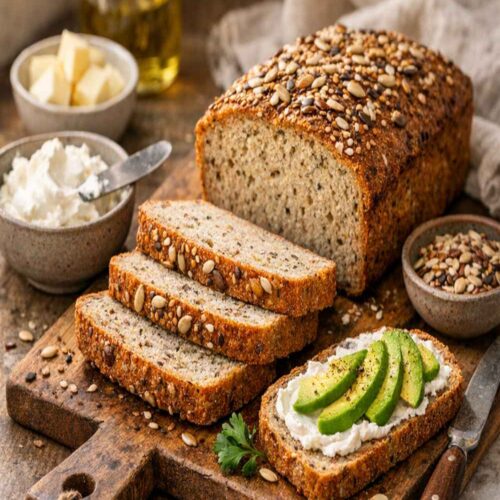
Carbohydrate-free bread is a clever reinvention using whole food ingredients to replace traditional grains. Instead of wheat flour—which delivers most of its calories from starch—this recipe leans on almond flour (packed with protein and healthy fats), psyllium husk powder (a soluble fiber that creates structure), and eggs (which provide lift and binding).
The result is a loaf with less than 2 grams of digestible carbohydrates per slice, compared to 15-20 grams in regular bread. You get the crumb, the crust, the chew. What you don’t get is the blood sugar spike or that drowsy feeling after eating.
This approach originated in low-carb and ketogenic communities about a decade ago, but it’s evolved beyond trend into genuine nutrition science. The fiber-to-carb ratio here actually supports digestive health—something traditional bread simply can’t claim.
Why You’ll Love This Carbohydrate Free Bread Recipe
- Real bread texture – Not a dense brick or crumbly mess. This has actual crumb structure, a proper crust, and the satisfaction of real bread.
- Blood sugar friendly – The almond flour and psyllium husk combination means steady energy without the crash that follows refined carbohydrates.
- High in protein and healthy fats – Eggs and almond flour keep you satisfied longer, making this genuinely satiating in a way low-carb substitutes often aren’t.
- Works for multiple diets – Whether you’re managing diabetes, following keto, or simply trying to reduce refined carbs, this bread fits seamlessly.
- Actually tastes good – I say this as both a dietitian and a person who grew up eating real bread. This isn’t a guilt-free compromise that tastes like cardboard. It’s delicious.
- Makes your kitchen smell amazing – There’s something therapeutic about the aroma of fresh bread, and this delivers exactly that.
The Ingredients
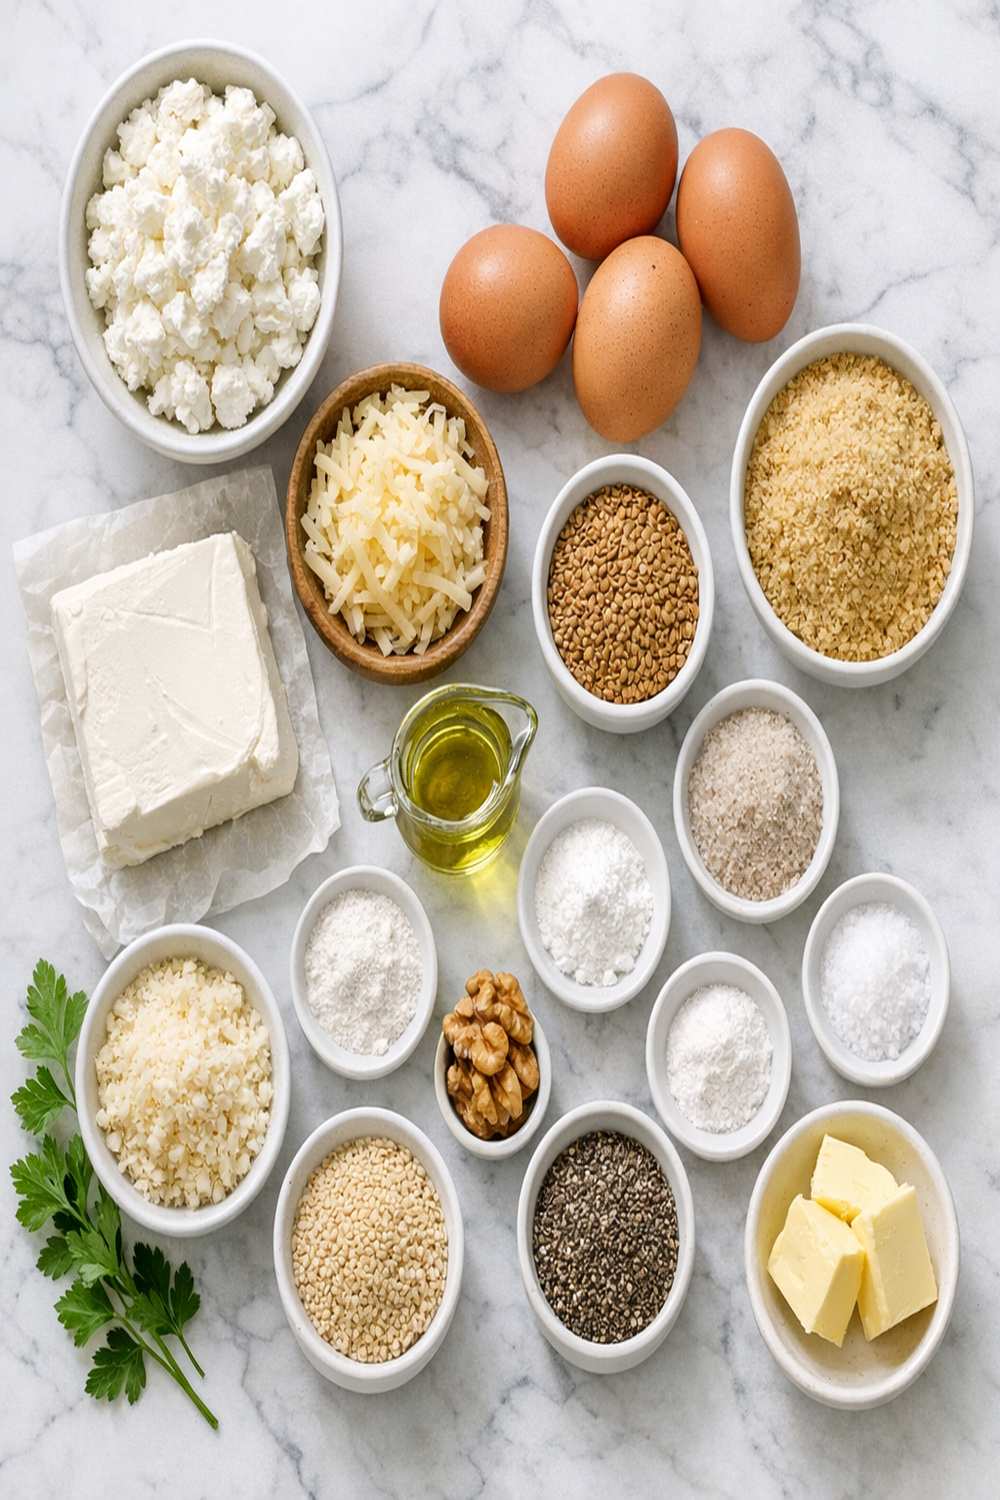
I’ve chosen each ingredient deliberately here. The almond flour provides that tender crumb and mild richness. The psyllium husk acts as a binder and creates elasticity—it’s doing the heavy lifting that gluten normally does. Coconut oil adds subtle flavor and helps with browning. Everything else supports structure and rise. Together, these make one loaf, which yields about 10-12 slices depending on how you cut it.
- 1/2 teaspoon xanthan gum (optional, but adds chewiness if you want it)
- 4 large eggs (at room temperature—they whip better and create more volume)
- 1 tablespoon baking powder (aluminum-free if you’re sensitive)
- 1/4 cup coconut oil (measured solid, then melted before adding)
- 1/2 teaspoon sea salt (brings out the subtle nuttiness of almond)
- 1/2 cup warm water (about 110°F, helps the psyllium activate)
- 2 cups blanched almond flour (finely ground, not almond meal, which is coarser)
- 1/4 cup psyllium husk powder (this is the secret to bread-like texture)
How to Make Carbohydrate Free Bread?
I’ll walk you through this step-by-step. The process is straightforward, but timing and technique matter because we’re working with ingredients that behave differently than wheat flour. One thing I always remind myself: this takes longer to bake than you’d expect, and that’s actually a sign it’s doing what it should. Don’t rush it.
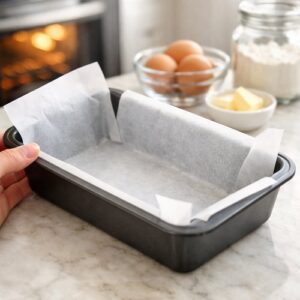
Step 1: Preheat and Prepare Your Pan
Turn your oven to 350°F (175°C) and let it come fully to temperature—this usually takes about 15 minutes. While it heats, line a standard loaf pan with parchment paper, making sure it comes up the sides. This prevents sticking and makes removal easier. Trust me on this; I learned the hard way once.

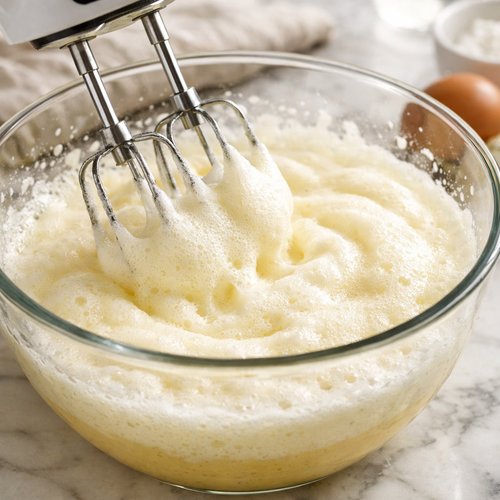
Step 2: Whip Your Eggs to Maximum Volume
Crack your 4 eggs into a large mixing bowl and use an electric hand mixer on high speed. This is non-negotiable. Whip for about 3-4 minutes until the eggs roughly double in volume and look pale and foamy. This creates air pockets that will become your bread’s crumb structure. It’s the closest we get to yeast-style rise in this recipe.
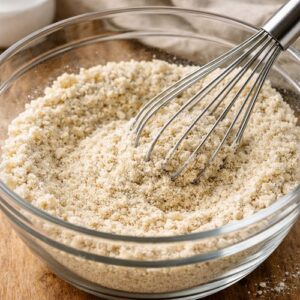
Step 3: Combine Your Dry Ingredients
In a separate large bowl, whisk together the almond flour, psyllium husk powder, baking powder, and salt. This takes about 1 minute. Whisk thoroughly to distribute the baking powder evenly—you don’t want pockets of it that create bitter spots. The psyllium especially needs to be evenly distributed or you’ll have dense sections.

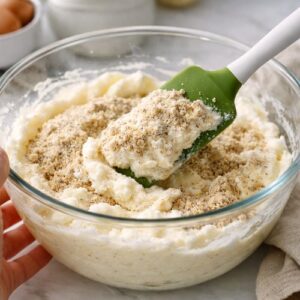
Step 4: Fold the Dry Ingredients Into the Eggs
This is where I switch from the electric mixer to a sturdy spatula. Gently fold the dry mixture into the whipped eggs using about 12-15 folds, being careful not to deflate all that wonderful air you just created. The batter will look thick and slightly grainy—that’s exactly right. Mix until just combined, no dry streaks visible.

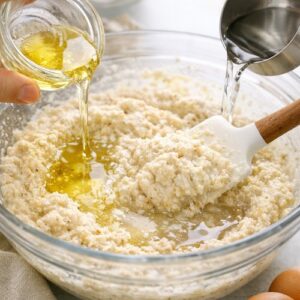
Step 5: Add the Coconut Oil and Water
Pour in your melted coconut oil and warm water. Fold gently for another 10-12 folds until everything is incorporated. The batter will be thick, almost like cookie dough—thicker than cake batter but definitely workable. This thickness is important; it won’t spread or collapse.

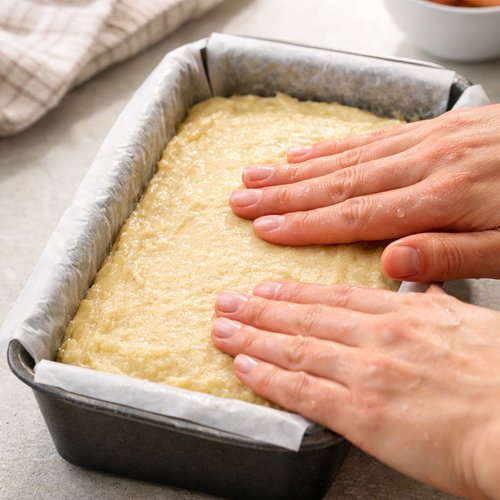
Step 6: Transfer and Shape
Pour the batter into your prepared loaf pan and smooth the top evenly with a spatula or your hands (slightly damp hands work best for this). Try to create a gently rounded top—this helps it bake evenly and creates a nicer crust. Take a moment to make it level; uneven batter bakes unevenly.
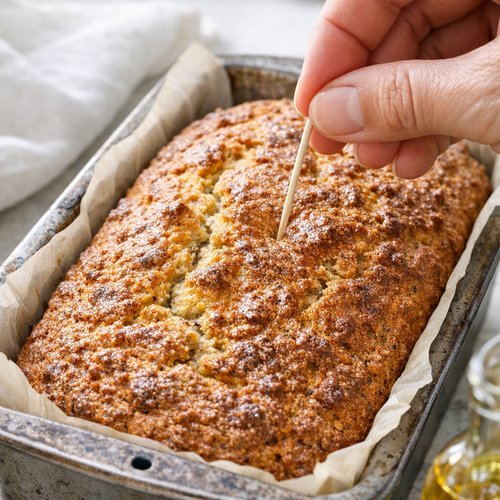
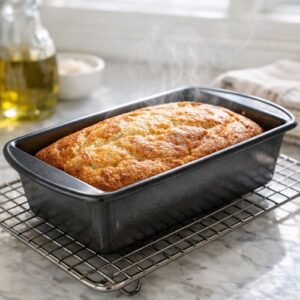
Step 7: Bake Until Completely Done
Bake for 55-70 minutes, depending on your oven. The key here is patience. Insert a toothpick at 55 minutes—it will likely come out clean around minute 60, but that’s not when you stop. You need the top to be very hard and crusty, like actual bread crust, not soft. This is the moment many people pull it out too early. Keep baking until the entire top is deeply golden and firm to the touch. If the top starts browning too much, tent it loosely with foil.
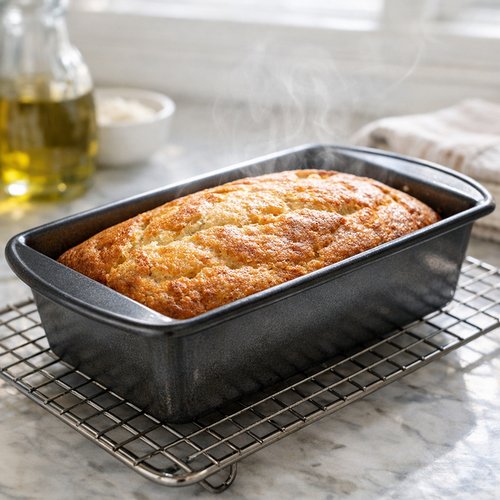
Step 8: Cool Completely Before Removing
This is the hardest step because your kitchen smells incredible. Let the bread cool in the pan for at least 15 minutes, then turn it out onto a wire rack and let it cool completely—ideally 30-45 minutes. This cooling time is when the crumb sets properly. Slice it too early and the interior is still slightly gummy. Patience rewards you here.
Expert’s Nutritional Insight
As a registered dietitian, I want to highlight why this bread actually nourishes you differently than traditional loaves. The combination of almond flour and eggs provides complete protein—all nine essential amino acids—which is rare in bread. Most carbohydrate-based breads are incomplete proteins, leaving you hungry sooner.
The psyllium husk deserves special attention: it’s a soluble fiber that feeds beneficial gut bacteria and supports stable blood sugar. USDA data shows that 1 ounce of psyllium husk provides 7 grams of fiber with only 1 gram of digestible carbohydrate. This is exactly the opposite of what you get from wheat bread. Your digestive system will thank you.
Tips and Tricks
- Room temperature eggs matter more here than in most baking – Cold eggs won’t whip to full volume, and you’ll lose the lift that makes this bread actually airy. Take them out 30 minutes before baking.
- Don’t skip the psyllium husk powder – You can’t substitute it with regular fiber supplements. The specific binding properties of psyllium create the bread structure. Chia or flax will not work the same way.
- Invest in a quality almond flour – Blanched almond flour (with the skins removed) gives you a finer crumb and lighter color. Unblanched or almond meal will be coarser and denser.
- The batter will seem thick—trust it – First-time makers often think something’s wrong and add more water. Don’t. This thickness is exactly what creates good crumb structure.
- Use a loaf pan, not a regular cake pan – The shape matters for even baking. A loaf pan’s narrow sides help create that proper bread shape and crust.
Make-Ahead Guide
One of the best parts about this bread? It makes meal prep effortless.
Same-day storage: Keep your cooled loaf in an airtight container at room temperature for up to 8 hours. The crumb actually becomes slightly more tender after a few hours as moisture redistributes.
Refrigerator storage: Store in an airtight container for up to 5 days. The bread won’t dry out like regular bread because of its higher fat content. I actually prefer it after 24 hours—the flavors mellow slightly.
Freezer storage: Slice the bread, wrap individual slices in parchment, then place in a freezer bag. Freeze for up to 3 months. Toast straight from frozen—it defrosts beautifully and tastes almost fresh-baked. This is my favorite hack for busy weeks.
Make double batches: The recipe doubles easily. Make two loaves on Sunday, freeze one, and enjoy fresh bread with different toppings throughout the week.
Common Mistakes to Avoid
- Under-whipping the eggs – If you skip or rush the whipping step, your bread will be dense and heavy. Those whipped eggs are your only leavening agent, so this step is critical.
- Pulling the bread out too early – The toothpick test will pass before the bread is truly done. Many people make this mistake. Wait for that hard, crusty top. The interior continues cooking as the outside sets.
- Using instant psyllium husks or whole seeds instead of powder – The texture will be completely different and grainy. You need the powder form specifically.
- Cold ingredients – Room temperature eggs and warm water help everything incorporate smoothly. Cold ingredients make the batter lumpy and uneven.
Seasonal Variations
Spring/Summer: Add 1 teaspoon of lemon zest and 1/2 teaspoon of fresh lemon juice to the egg mixture. It brightens the bread beautifully and pairs perfectly with light summer meals. You can also add 1 tablespoon of fresh dill if you want a savory version.
Fall/Winter: Reduce the water to 1/4 cup and add 1/2 teaspoon of cinnamon, 1/4 teaspoon of nutmeg, and a tiny pinch of cloves to your dry ingredients. This creates an almost autumn-spice bread that’s wonderful toasted with butter.
Year-round savory option: Skip any sweetness and add 1 tablespoon of Italian herb seasoning or everything bagel seasoning to the dry ingredients. This makes an incredible savory bread for sandwiches.
Can I Store Carbohydrate Free Bread?
Absolutely, and it stores beautifully because the fat content keeps it moist. At room temperature in an airtight container, this bread lasts up to 8 hours without drying out. In the refrigerator, sealed tightly, it keeps for up to 5 days and actually improves slightly as flavors develop.
For longer storage, freezing is your best option. Slice the cooled loaf, separate slices with parchment paper, and freeze in an airtight freezer bag for up to 3 months. I pull out slices as I need them and toast them straight from frozen. They taste remarkably fresh this way.
One thing I’ve noticed: unlike regular bread that goes stale and hard, this bread may become slightly more moist over time due to its ingredients. Store it uncovered if it starts sweating, or wrap it more loosely to allow some air circulation.
Nutrition Information
Per slice (based on 12 slices per loaf): approximately 180 calories, 15 grams fat, 6 grams protein, 2 grams net carbohydrates, 4 grams total carbohydrates, 2 grams fiber. These numbers come from USDA FoodData Central and account for the specific ingredients used.
What I find most valuable as a dietitian is the protein-to-carb ratio. You’re getting 6 grams of protein against only 2 grams of digestible carbs. This keeps blood sugar stable and satiety high—exactly what your body needs at a meal. Compare this to regular bread at roughly 3 grams protein and 15 grams carbs per slice, and you see why this becomes a game-changer for people managing blood sugar or weight.
The fiber content is also significant. 2 grams of fiber per slice supports digestive health and contributes to feeling full. Over a day eating two slices, you’re getting fiber equivalent to a small apple.
What Can I Serve With Carbohydrate Free Bread?
This bread’s neutral flavor and satisfying texture make it incredibly versatile. Slice it thick for a sturdy sandwich base, or toast thinner slices for breakfast. I love pairing it with my Avocado Chicken Healthy Recipe for a complete, balanced lunch. For dinner, it’s perfect alongside any protein and vegetable combination.
- Breakfast: Toast a slice, top with almond butter and sugar-free jam, or go savory with cream cheese and smoked salmon.
- Lunch: Use two slices for sandwiches—the bread is sturdy enough to hold hearty fillings without falling apart. It pairs beautifully with turkey, roast beef, or that avocado chicken salad.
- Dinner: Serve alongside grilled fish or steak with roasted vegetables. The slight nuttiness from the almond flour complements protein-forward meals.
- Snack: A slice toasted with butter and a sprinkle of sea salt is simple, satisfying, and keeps you full between meals.
Substitutes
- For the almond flour: You could use sunflower seed flour (same amount), but the bread will be slightly denser and may have a more mineral taste. Pecan flour creates a richer flavor but is more expensive.
- For the psyllium husk powder: This is harder to substitute because its binding properties are unique. Ground flaxseed or chia creates a different texture—you’d need to reduce water slightly and expect a grainier crumb. I don’t recommend this substitution.
- For the coconut oil: Use melted butter or avocado oil. The bread will taste slightly different but bake similarly. Avoid olive oil, which has a strong flavor that fights with almond.
- For regular baking powder: Use aluminum-free baking powder if you’re sensitive. Don’t substitute baking soda alone; you need the acid component that baking powder provides.
Carbohydrate Free Bread Recipe
Ingredients
- 1/2 teaspoon xanthan gum optional, but adds chewiness if you want it
- 4 large eggs (at room temperature
- 1 tablespoon baking powder aluminum-free if you're sensitive
- 1/4 cup coconut oil measured solid, then melted before adding
- 1/2 teaspoon sea salt brings out the subtle nuttiness of almond
- 1/2 cup warm water about 110°F, helps the psyllium activate
- 2 cup blanched almond flour finely ground, not almond meal, which is coarser
- 1/4 cup psyllium husk powder this is the secret to bread-like texture
Instructions
Step 1: Preheat and Prepare Your Pan
- Turn your oven to 350°F (175°C) and let it come fully to temperature—this usually takes about 15 minutes. While it heats, line a standard loaf pan with parchment paper, making sure it comes up the sides. This prevents sticking and makes removal easier. Trust me on this; I learned the hard way once.
Step 2: Whip Your Eggs to Maximum Volume
- Crack your 4 eggs into a large mixing bowl and use an electric hand mixer on high speed. This is non-negotiable. Whip for about 3-4 minutes until the eggs roughly double in volume and look pale and foamy. This creates air pockets that will become your bread's crumb structure. It's the closest we get to yeast-style rise in this recipe.

Step 3: Combine Your Dry Ingredients
- In a separate large bowl, whisk together the almond flour, psyllium husk powder, baking powder, and salt. This takes about 1 minute. Whisk thoroughly to distribute the baking powder evenly—you don't want pockets of it that create bitter spots. The psyllium especially needs to be evenly distributed or you'll have dense sections.
Step 4: Fold the Dry Ingredients Into the Eggs
- This is where I switch from the electric mixer to a sturdy spatula. Gently fold the dry mixture into the whipped eggs using about 12-15 folds, being careful not to deflate all that wonderful air you just created. The batter will look thick and slightly grainy—that's exactly right. Mix until just combined, no dry streaks visible.
Step 5: Add the Coconut Oil and Water
- Pour in your melted coconut oil and warm water. Fold gently for another 10-12 folds until everything is incorporated. The batter will be thick, almost like cookie dough—thicker than cake batter but definitely workable. This thickness is important; it won't spread or collapse.
Step 6: Transfer and Shape
- Pour the batter into your prepared loaf pan and smooth the top evenly with a spatula or your hands (slightly damp hands work best for this). Try to create a gently rounded top—this helps it bake evenly and creates a nicer crust. Take a moment to make it level; uneven batter bakes unevenly.

Step 7: Bake Until Completely Done
- Bake for 55-70 minutes, depending on your oven. The key here is patience. Insert a toothpick at 55 minutes—it will likely come out clean around minute 60, but that's not when you stop. You need the top to be very hard and crusty, like actual bread crust, not soft. This is the moment many people pull it out too early. Keep baking until the entire top is deeply golden and firm to the touch. If the top starts browning too much, tent it loosely with foil.

Step 8: Cool Completely Before Removing
- This is the hardest step because your kitchen smells incredible. Let the bread cool in the pan for at least 15 minutes, then turn it out onto a wire rack and let it cool completely—ideally 30-45 minutes. This cooling time is when the crumb sets properly. Slice it too early and the interior is still slightly gummy. Patience rewards you here.
Notes
Nutrition
FAQs
Why does my bread have a dense bottom?
This usually happens when the oven temperature is too high or if you’re not baking long enough. The bottom sets before the interior crumb finishes cooking. Try baking at exactly 350°F using an oven thermometer (many ovens run hot), and resist pulling it out until the top is truly crusty. Also, make sure your oven rack is in the middle position for even heat distribution.
Can I use whole psyllium husks instead of powder?
Not successfully, I’m afraid. Whole husks are larger and won’t integrate smoothly into the batter. You’ll get a grainy, unpleasant texture. The powder is essential because its fine particle size allows it to act as a binder. This is one ingredient where substitution really doesn’t work.
My bread is too gummy inside—what happened?
This is usually an underbaking issue. The toothpick test is deceiving with this particular recipe because it passes earlier than the bread is truly done. Make sure you’re baking for the full 55-70 minutes, and that the top is deeply golden and hard to the touch. Also, make sure you’re cooling completely before slicing—slicing too early disrupts the structure before it sets.
Can I make this in a bread machine?
Not reliably. This batter is too thick for standard bread machine cycles, and the batter doesn’t rise the way yeast breads do. The whipped eggs are your entire leavening system, and they deflate in a machine. I’d stick with oven baking for best results.
Is this bread appropriate for people with nut allergies?
Unfortunately not—the almond flour is a core ingredient. However, you could try sunflower seed flour as a substitution, though the flavor and texture will be noticeably different. You’d need to test this carefully, and I’d recommend consulting with an allergist before serving to someone with severe allergies.
More Recipes You’ll Love
- 0 Carb Bread Recipe – Another excellent low-carb option if you want to experiment with different approaches
- Authentic Mexican Chicken Taco Recipe – Perfect protein to serve alongside fresh-sliced bread
- Bake Liver Recipe – A nutrient-dense protein option that pairs beautifully with this bread for serious nutrition
Final Thoughts
I think what excites me most about this bread is that it proves something I tell every client: healthy eating doesn’t mean sacrifice. It means knowing the right ingredients and understanding how to combine them in ways that actually work for your body.
That first batch I made, the one my skeptical husband came back for seconds on? He’s eaten this bread every single week for the past three years. It’s become as routine in our house as Sunday mornings. My parents visit, and my mom—the one who taught me that food is love—actually prefers it to her old white bread now. She says it keeps her steadier all afternoon.
That’s what real food does. It nourishes you, satisfies you, and becomes part of your life in the best way. This bread does all of that while respecting your health goals. Give it a try, trust the process, and don’t be surprised when this becomes your new normal.
Enjoy your cooking!!